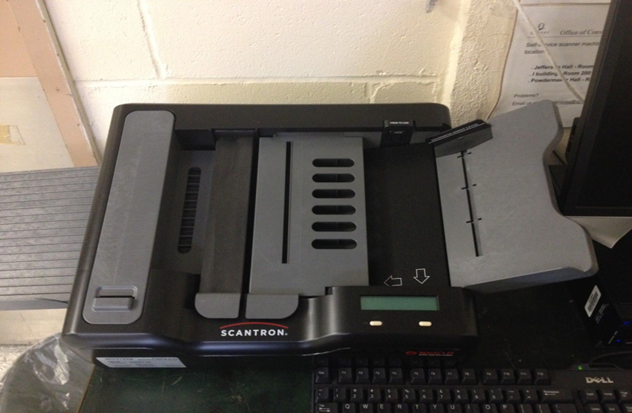
Scantron Machine Instructions
Scantron Machine Instructions
1. Press the “Power” Button.
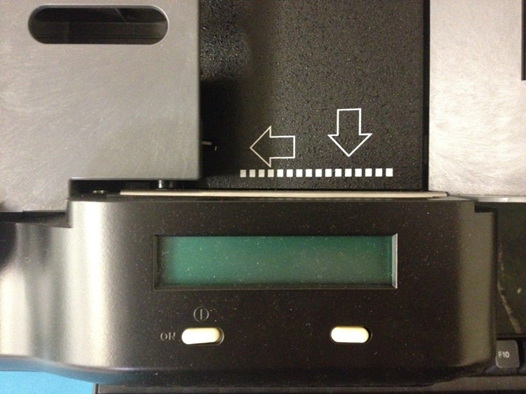
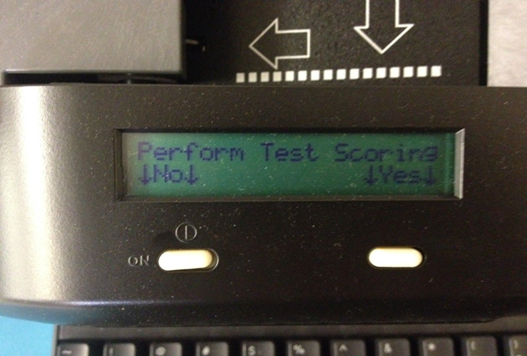
2. The screen MUST display “Perform Test Scoring” to continue. If it does not display the screen, select “No” until it is displayed.
3. On the “Perform Test Scoring” screen, press “Yes.”
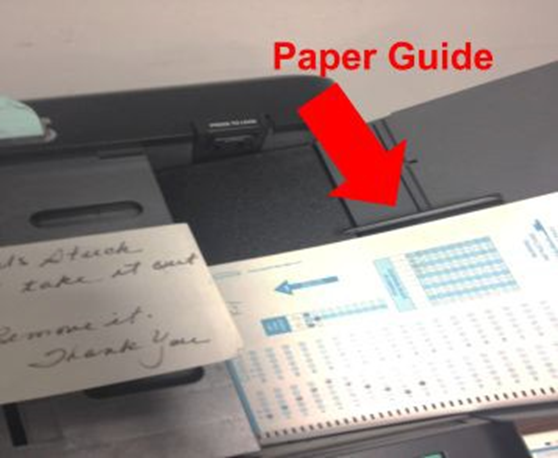
4. Place side 1 of the Answer Key scantron into the input tray. Verify that the sheet is as far to the left in the input tray, as possible. Slide the “Paper Guide” so that it just touches the scantron.
NOTE: Make sure you bubble in the “Key Item Count” before continuing. These are the number of questions on the Scantron for each side. For example, if there are 50 questions on side 1, bubble in 050. If there are 27 questions on side 2, bubble in 27.
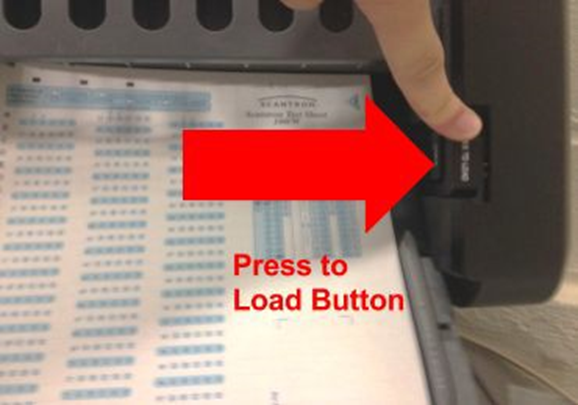
5. Press the “Press to Load” button located on the upper right hand side of the machine.
6. On the “Feed Test Key” screen, select “Start.”
7. On the “Feed Answer Sheet” screen, place Students Answer Sheets (side 1) into the scantron machine, the same way you placed the the master key, then press “Start.”
NOTE: On the “Paper Guide” there is a maximum sheet level.
8. If you want an Item Analysis, enter the Item Analysis Sheet (side 1) into the machine and press “Start.”
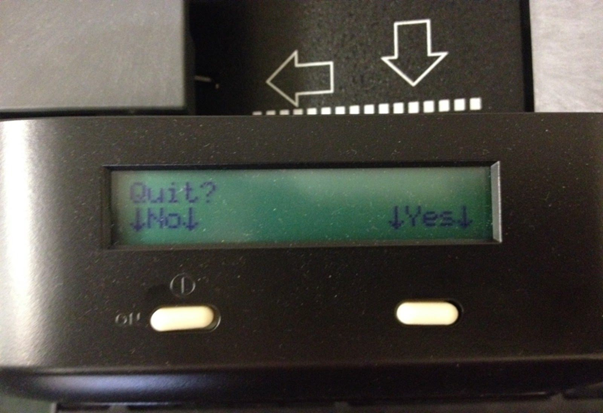
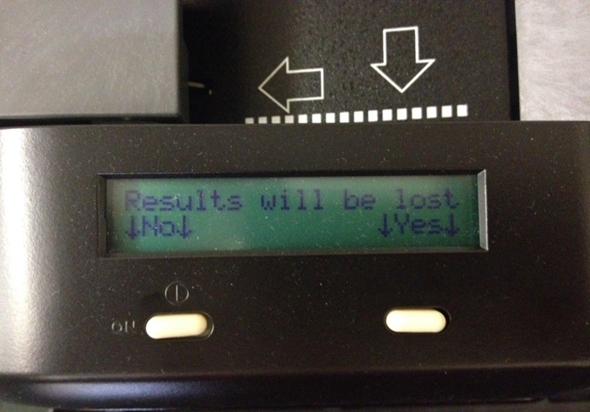
9. Select “Quit.” On the “Results will be Lost/Quit” screen, then press “Yes.”
Follow the next set of directions (Steps 10-13), if the Exam has more that 50
questions. If not, YOU ARE DONE.
10. For the reverse side of the scantron (side 2), follow steps 2-9. In step 8, use side 2 of the Item Analysis Sheet.
11. On side 1 of the Answer Key, change the “Key Item Count” to the total number of questions on both sides by bubbling that number in. For example, if there is a total of 77 questions for side 1 and 2, bubble in 077.
12. Bubble in (with pencil only), on top, “Rescore” and “Total Only/Both Side.”
13. Enter the Answer key (side 1) scantron back into the machine then follow steps 2-9, ignoring the NOTE in step 4. You will not need to scan the Item Analysis Sheet after this step.