How to Edit your Outlook Web Application (OWA) to Add the “FROM” field to your Email
1. To log into your Outlook Web Application (OWA), please type into the URL “mymail.qc.cuny.edu”

2. the Outlook Web Application (OWA) login page will appear

In the Outlook Web App, log into your OWA account using your CAMS user name (first initial, last name) and Password, then click SIGN IN
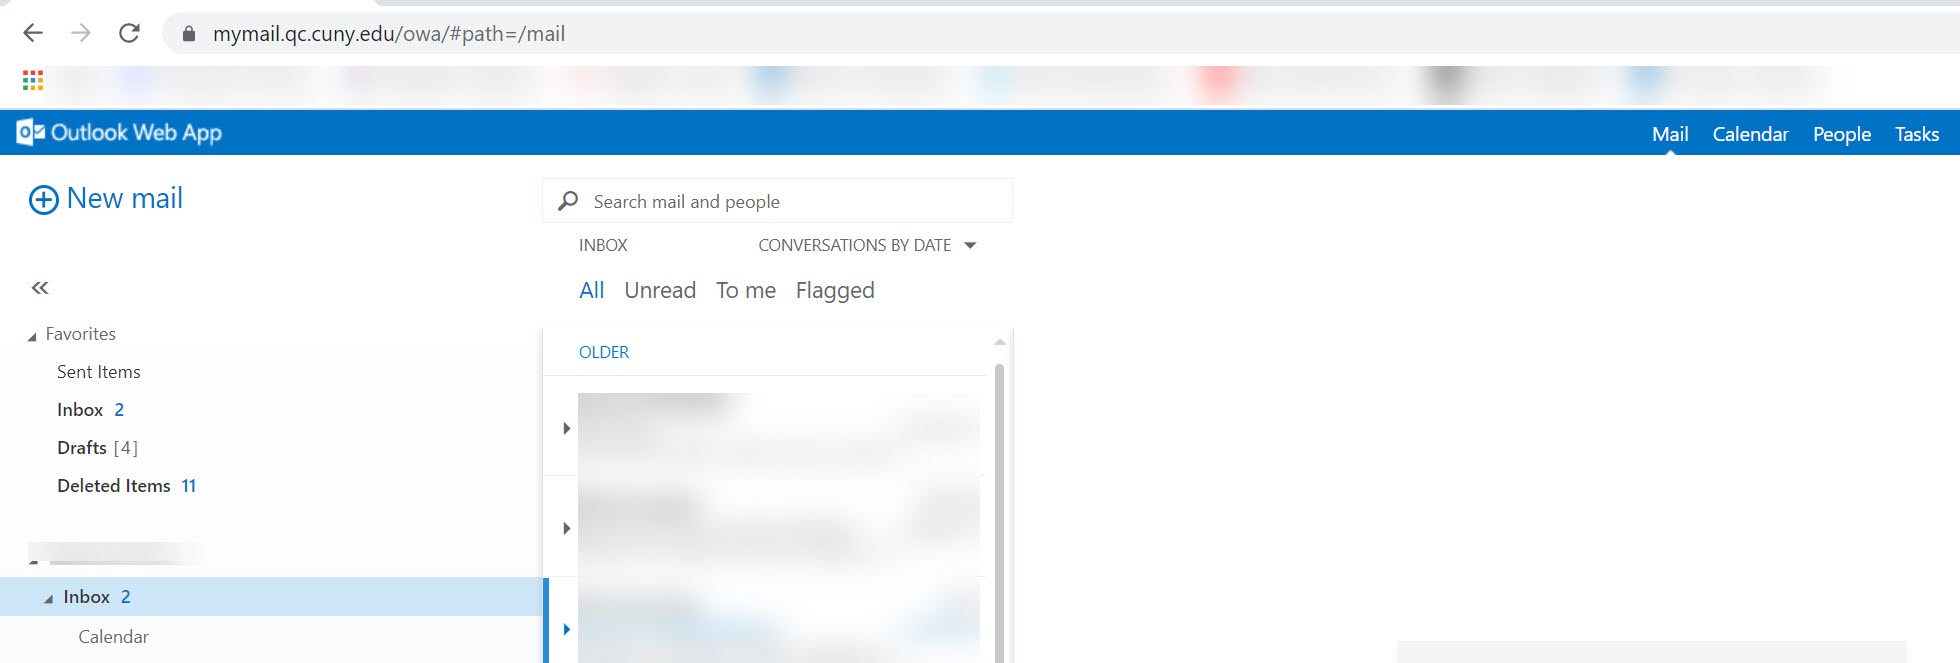
3. Once you are logged into the Outlook Web App, you will then see the Outlook Web App (OWA) mail screen.
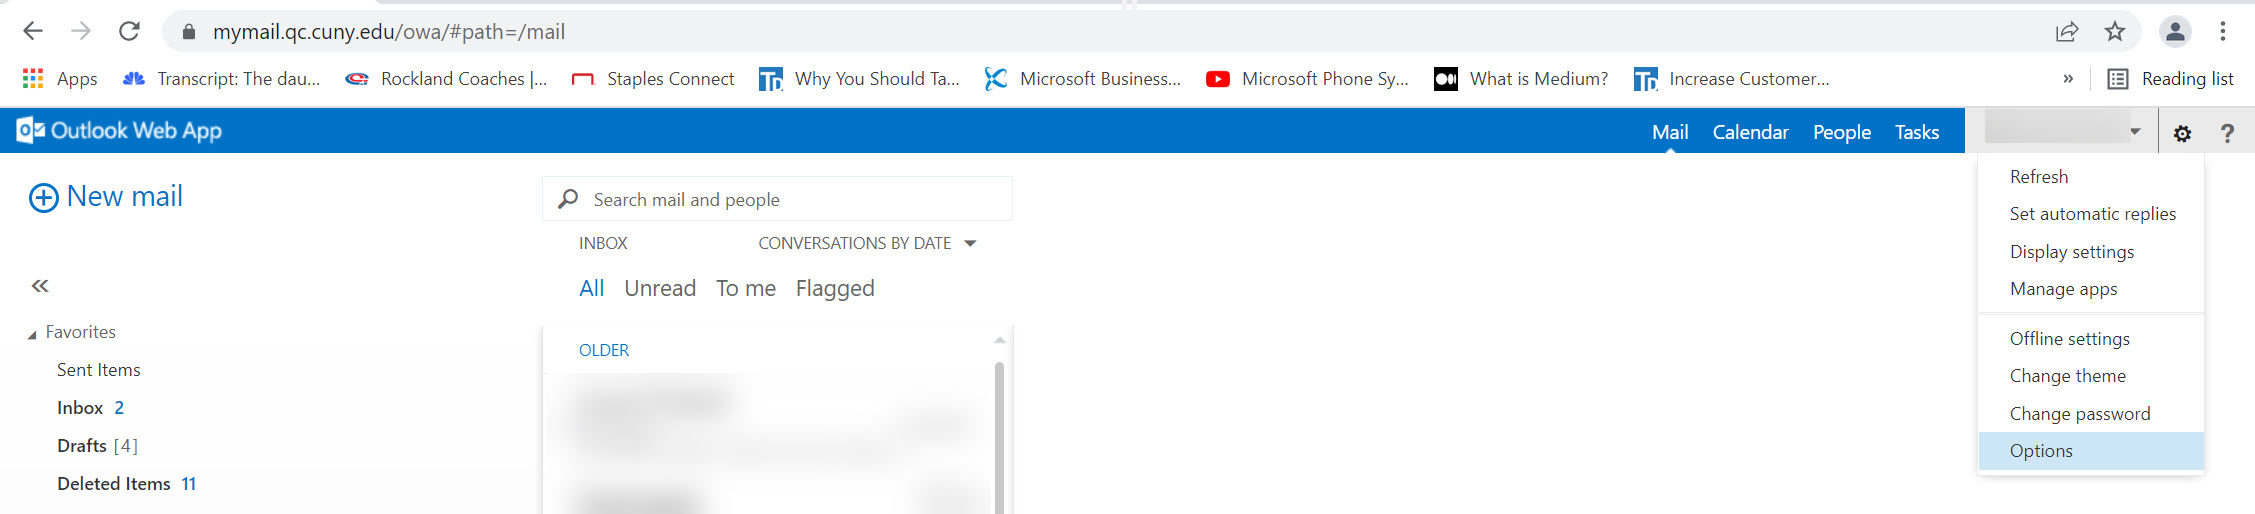
4. On the far right of your OWA mail screen page, next to your name you will see a Settings wheel icon

5. Click on the Settings icon button, which will display a dropdown menu

6. At the bottom of the dropdown menu, Select the “Options” label
7. The screen will then display Options, toggle down to the Settings selection within the Options field and remain in the Mail section
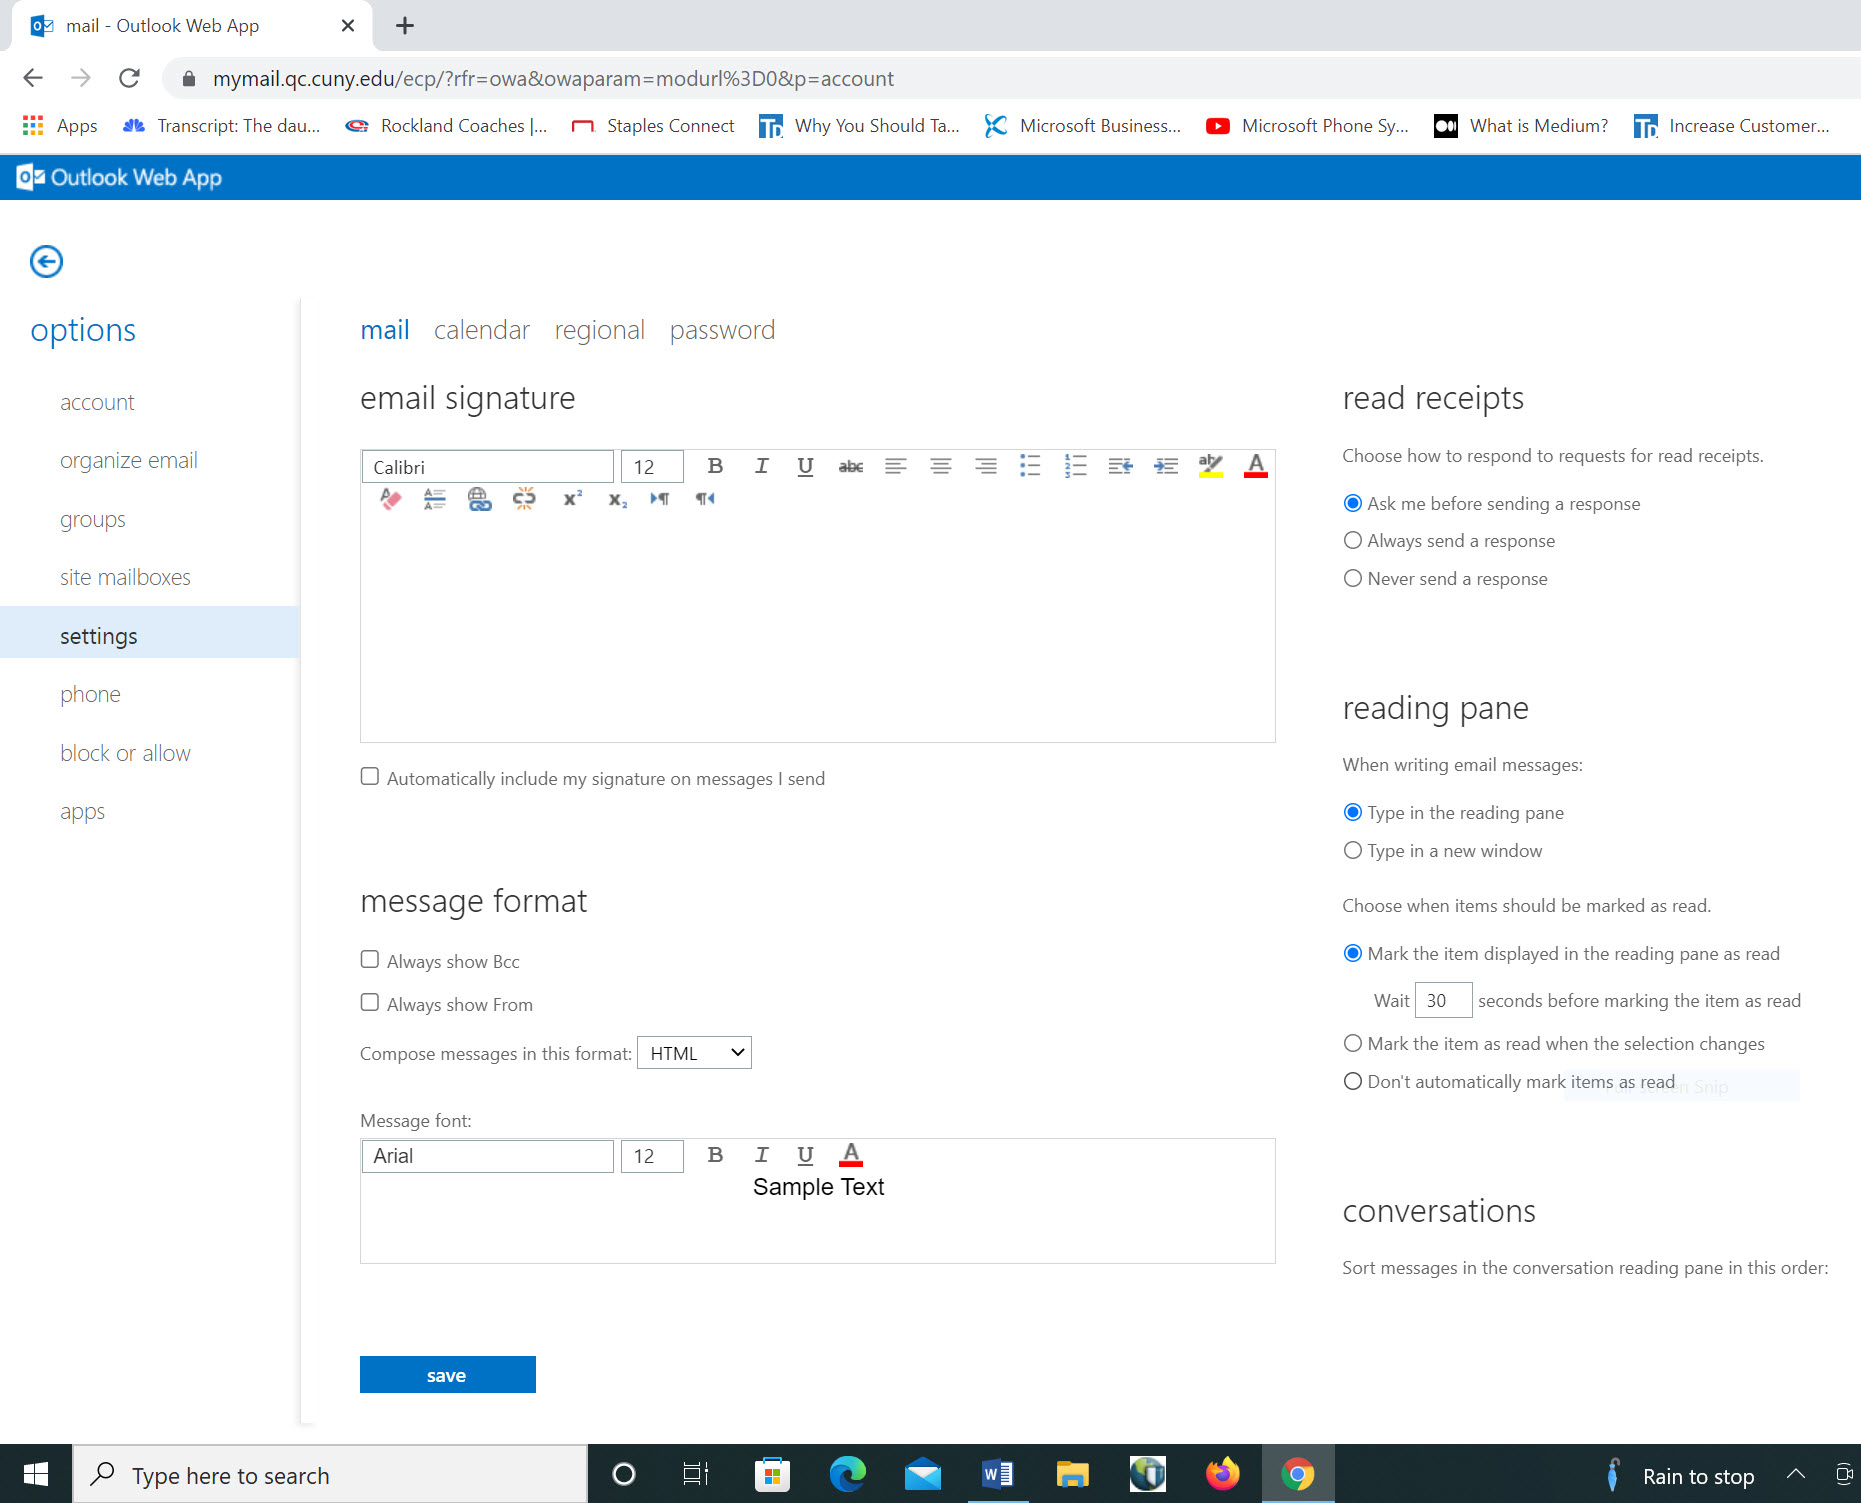
8. In the Mail section under the heading “Message Format” please select “Always show From”.
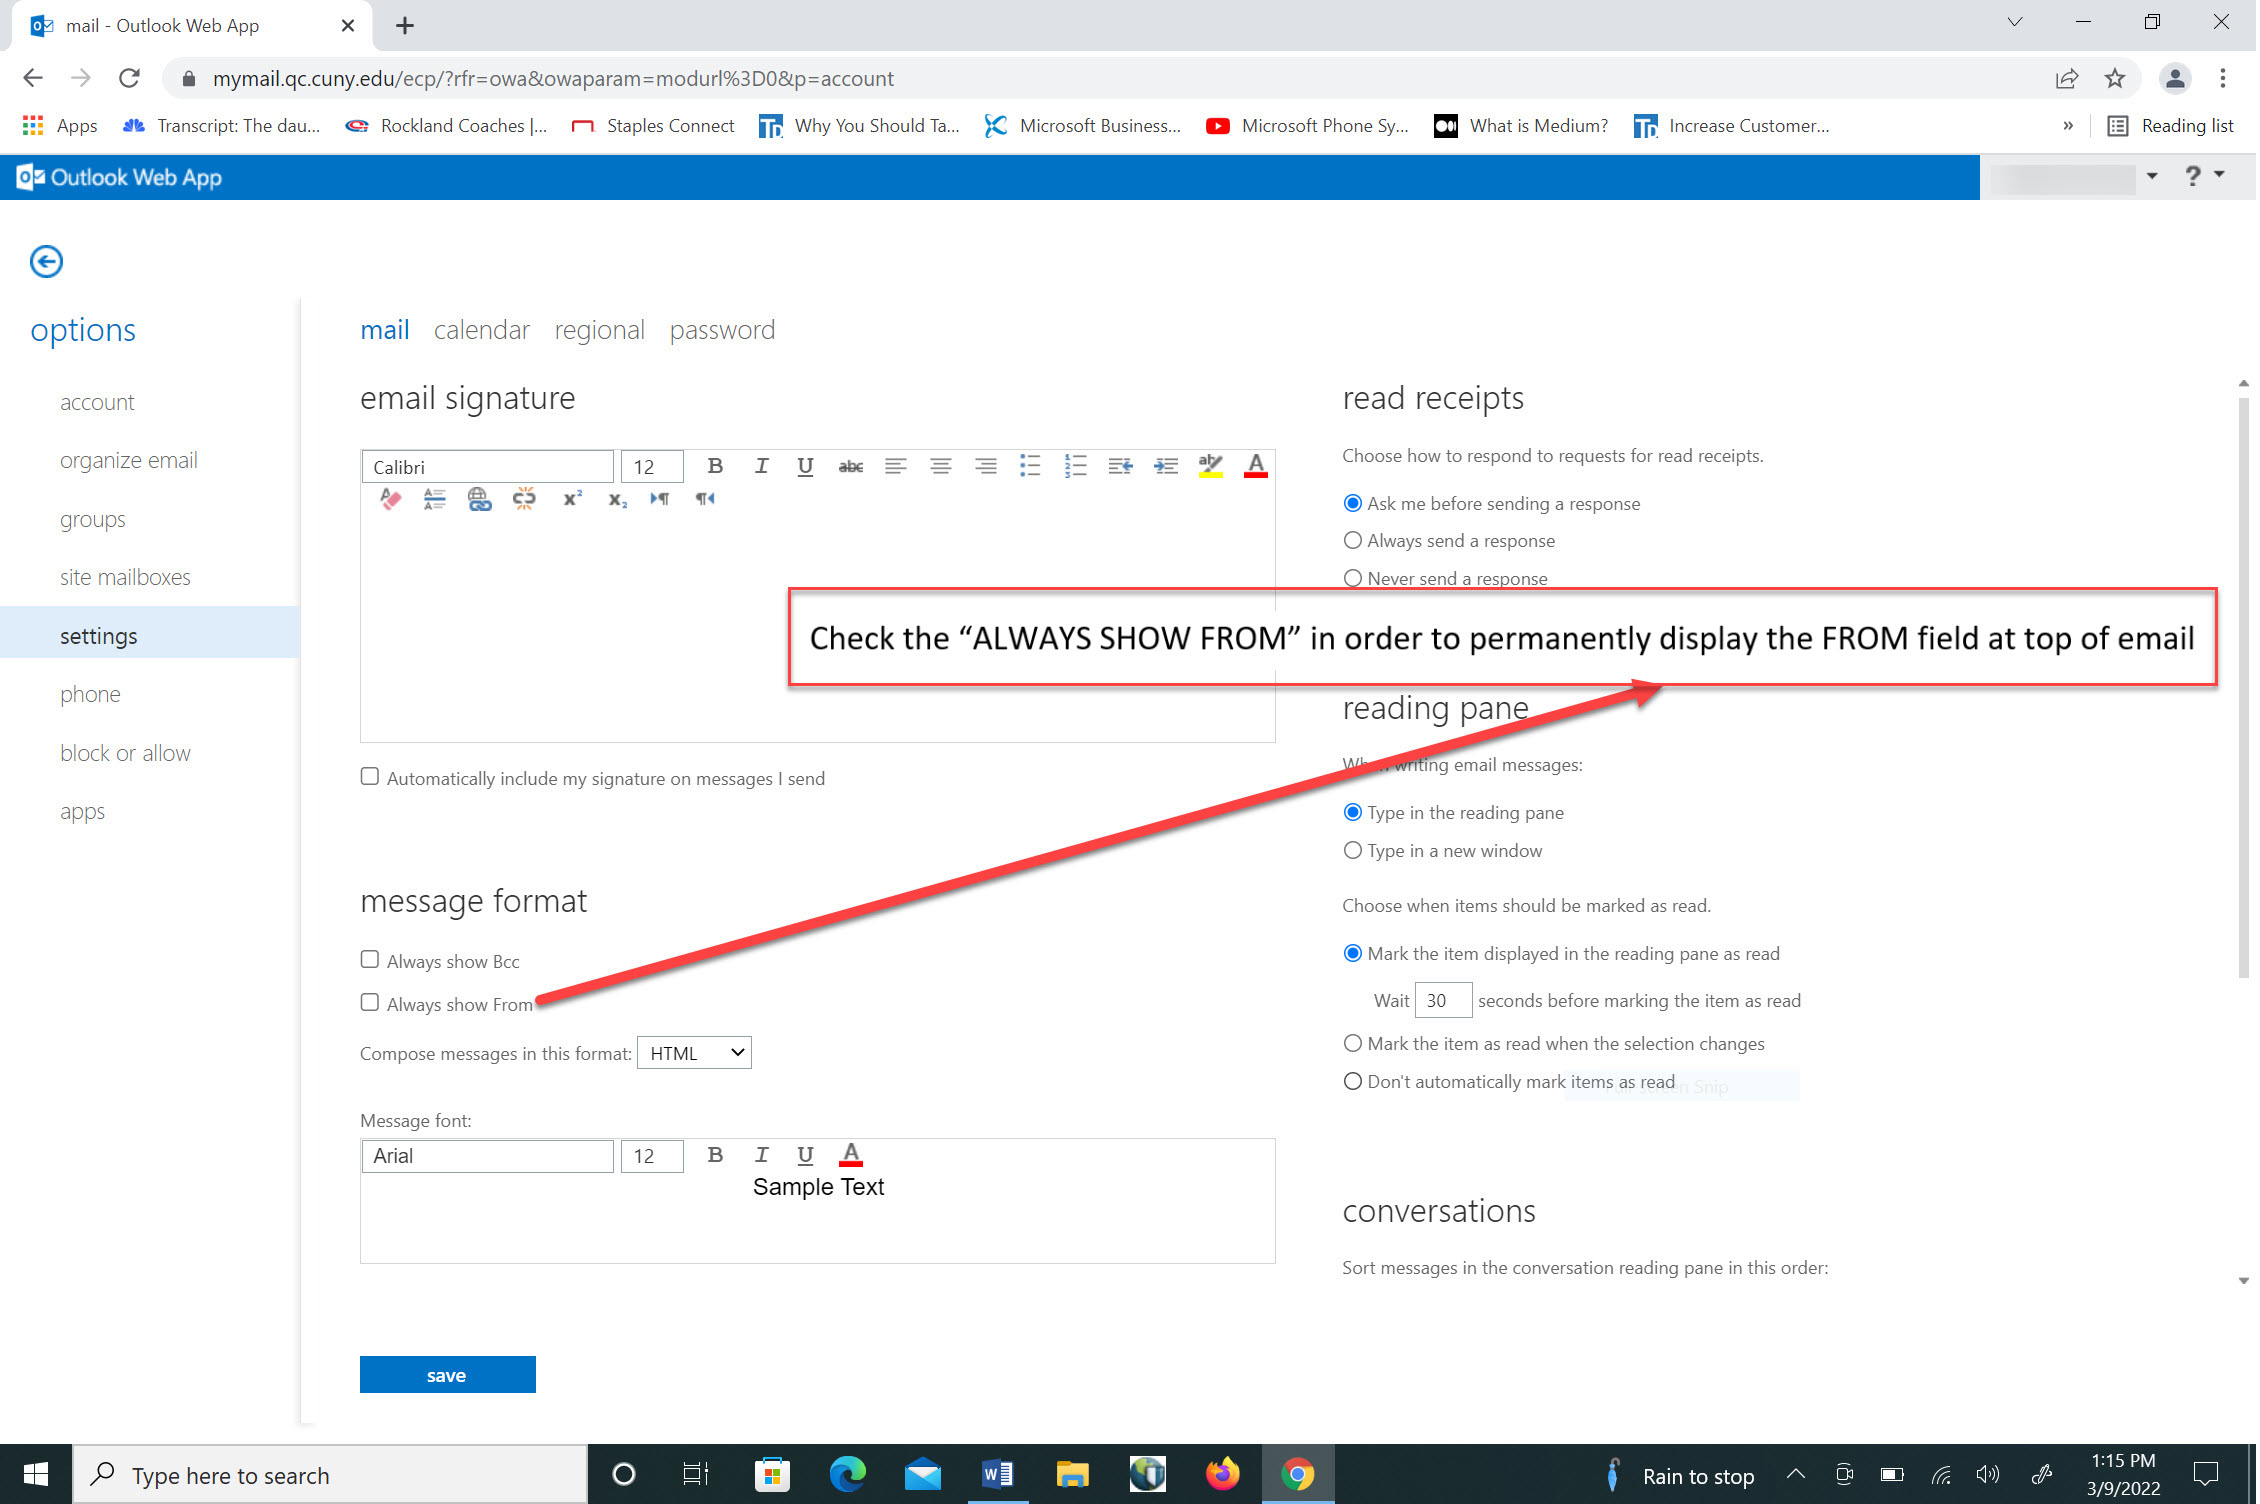
9. By choosing this selection, it will permanently display the FROM field at the top of your email automatically

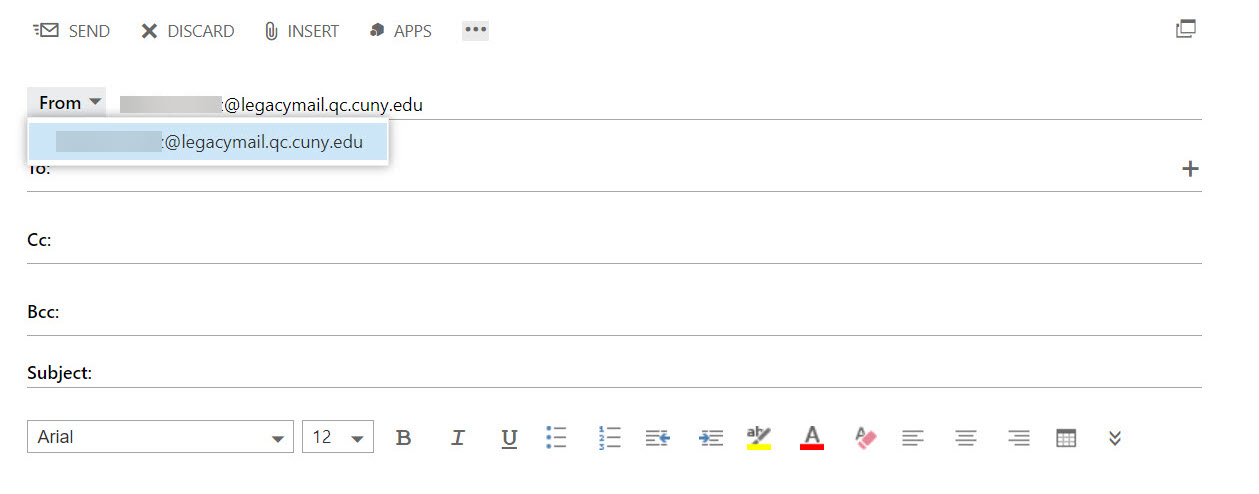
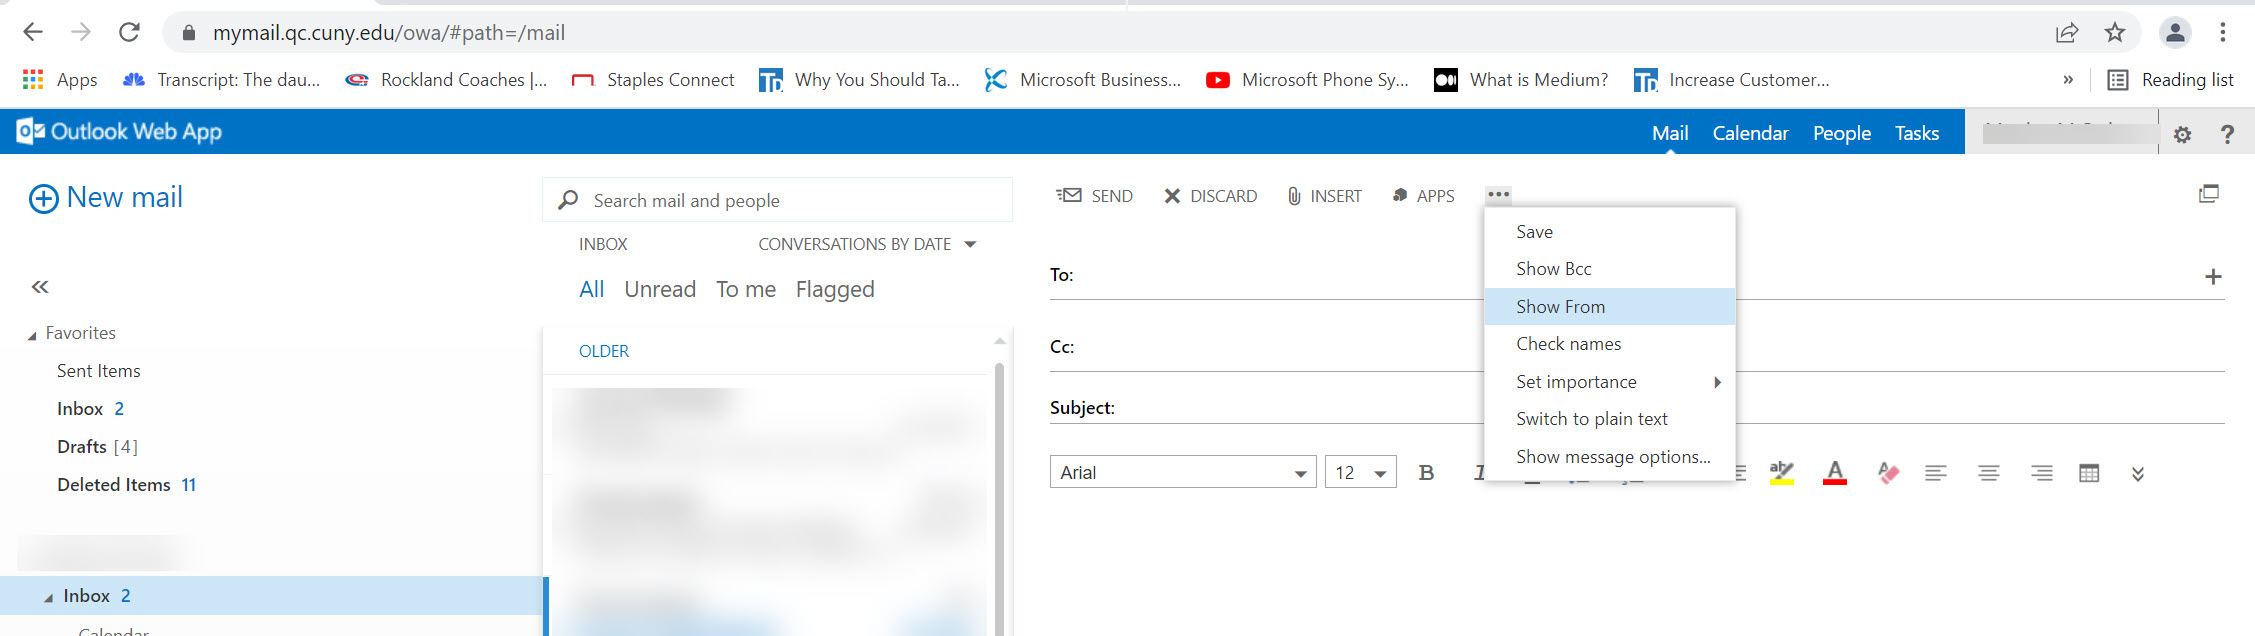
10. You can also display the FROM field on email as needed without permanently changing your SETTINGS.
You can create a new email, go to the 3 dots (ellipses) and drop down to SHOW FROM as displayed below
11. The FROM field will display as indicated below but will not remain displayed on future emails.
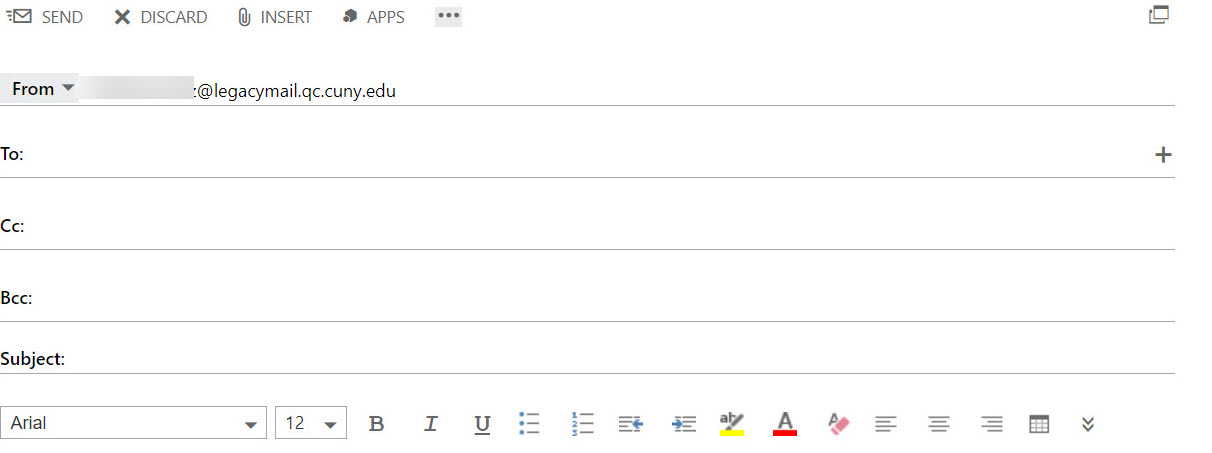
12. You can also click on the FROM field in order to determine how many emails you have in OWA that you can send messages from. In this instance, there is only one email available.