ADOBE: How to Fill in and Edit Forms in a Document

Quickly Edit and fill any PDF form online.
Use the Fill and Sign tool to easily edit and fill your forms or documents electronically. This document explains how to fill your forms from your desktop using Acrobat or Reader.
How to fill out your PDF form
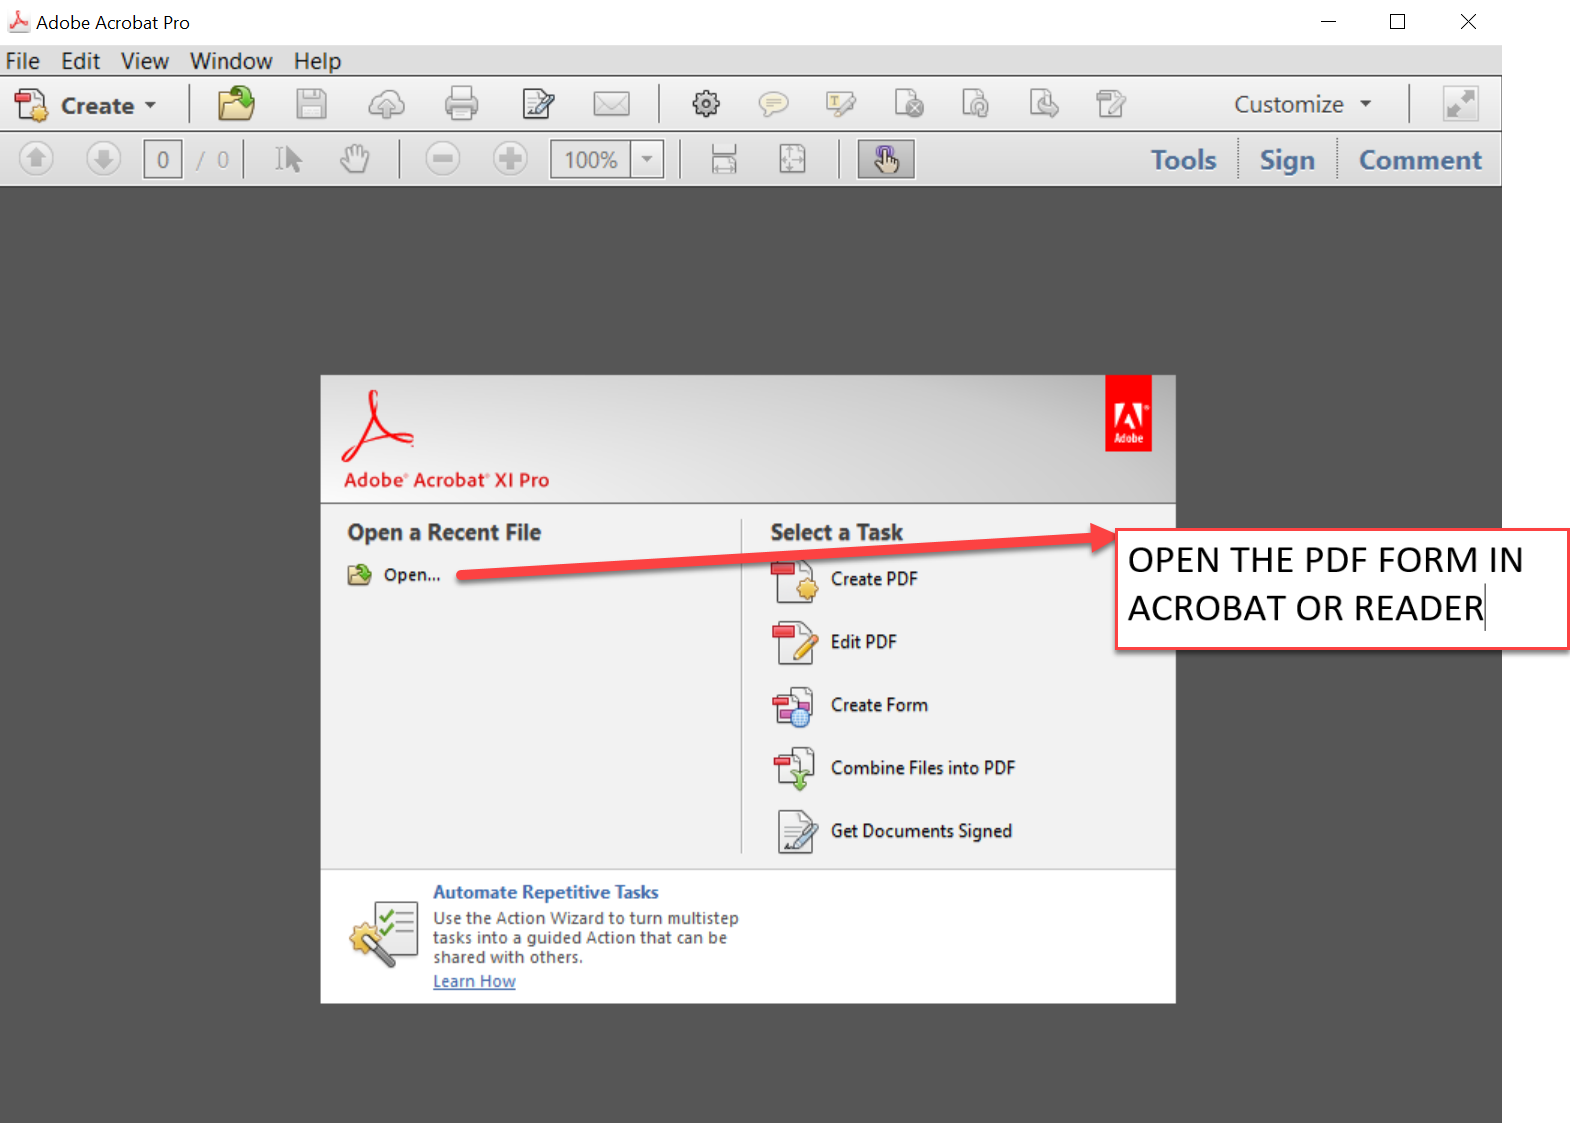
1. Open the PDF document or form in Acrobat or Reader.
2. Click Fill and Sign in the left pane. The Fill and Sign options are displayed.
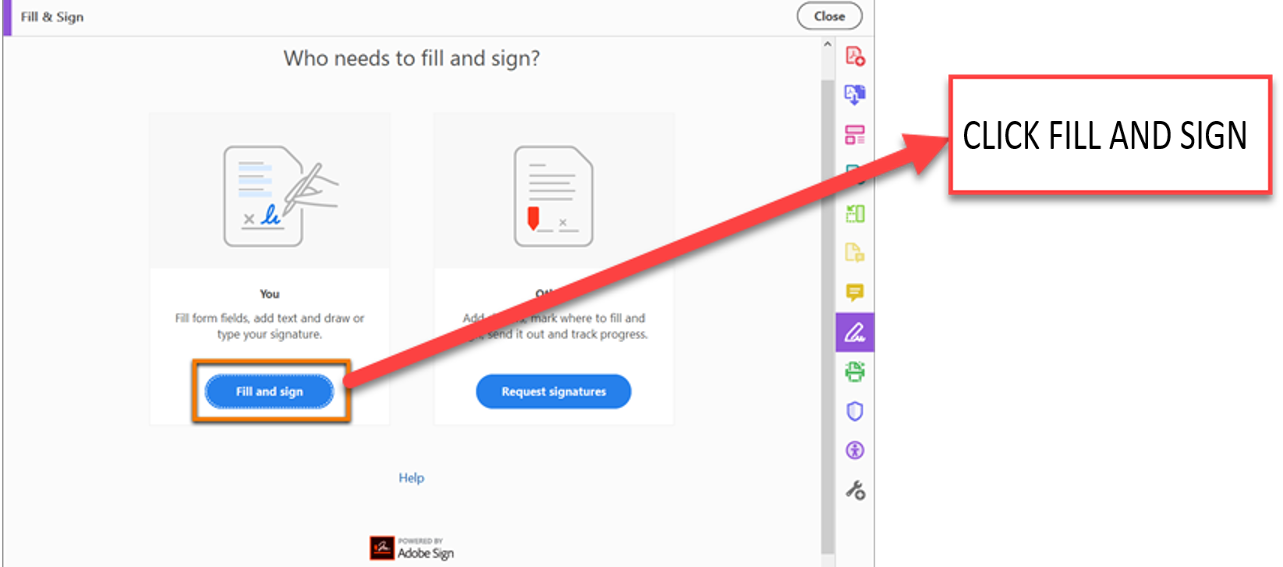
3. Click Fill and Sign. The specific tools and options are displayed in the toolbar. Use them to fill out your form.

A. The A display above shows what Annotations you can use when filling out the form
B. Is the Pen icon you use when you want to Sign a form
C. Allows you to choose the color of the ink in your document
Then click NEXT
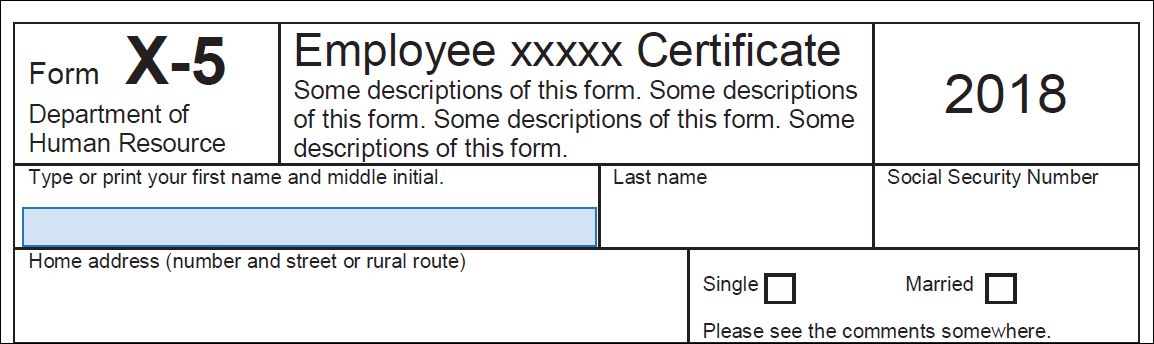
4. Then hover the mouse over a form field and if you see a blue box when you hover, that means the form is fillable or interactive meaning it contains fields that you can select or fill in. When you click anywhere in the blue box, the cursor is placed at the right position automatically.
Type your text to complete the field.
Hover the mouse over the desired location to display the detected text field
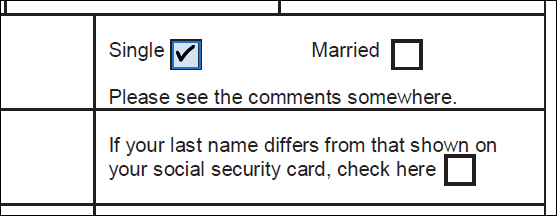
5. Similarly, for a checkbox or a radio button, click in the field to select the option.

Checkbox field auto-detected
If there is no blue box displayed when you hover over a form field, that means it's a flat form. You can manually fill or add text.
6. Click Add Text  in the toolbar. Click at the place in the document where you want to add the text, and then start typing.
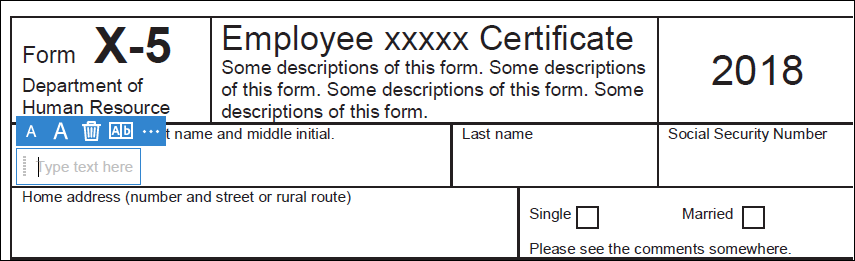
Use the displayed field toolbar to make appropriate changes:
7. To resize a field, use the font up or down button in the toolbar - the first two buttons from left. If you resize the first icon you place to fit the check box or radio button in the document, the next icon you add will be of the same size and will fit the rest of the box/circle fields.
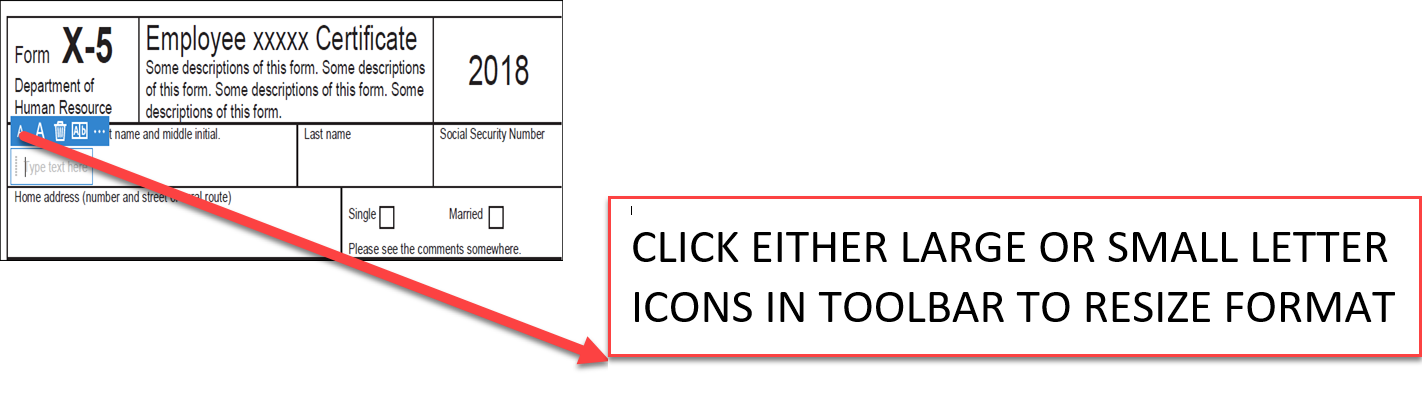
To move a field, move your pointer closer to field border until you see the drag handle, and then hold and move the field as required.
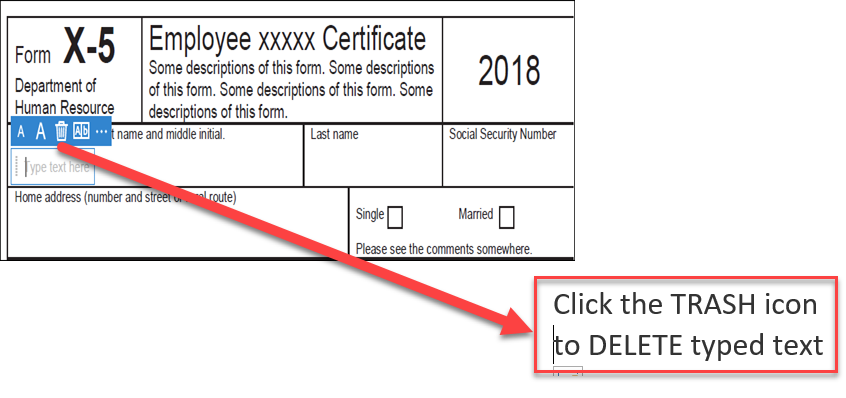
8. To delete a field or typed text, click the trash button.
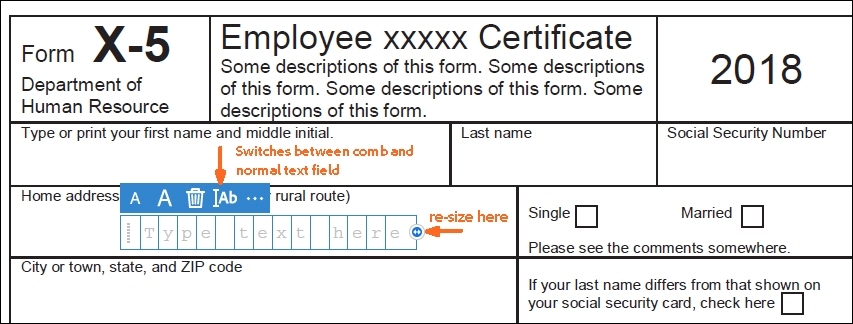
9. To convert a normal text field into the comb field or vice versa, click the comb button - the second button from the right.
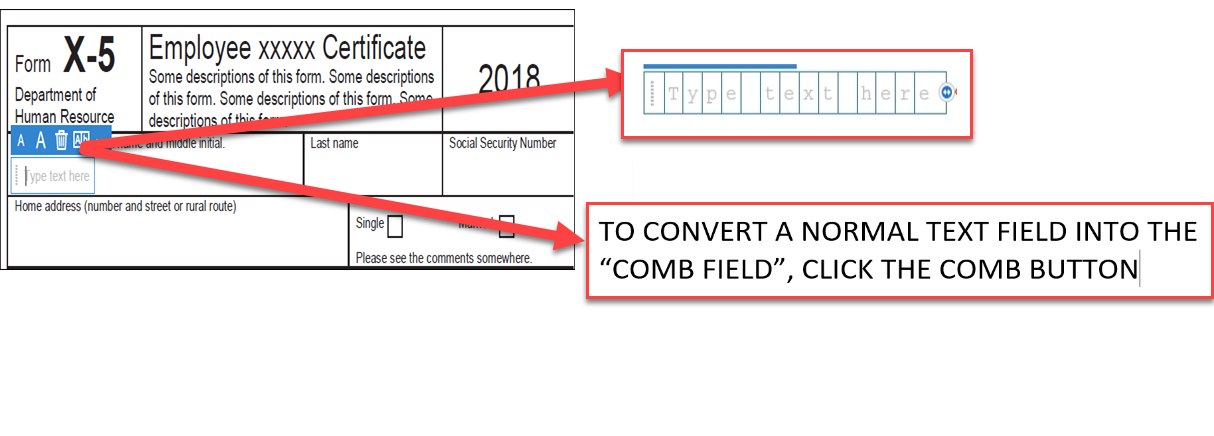
Use Comb fields to fill or add text in continuous boxes in a line/row as shown below.
The Comb field spreads the user-entered text evenly across the width of the text field.
10. While you are typing, if the characters do not fit in each box, adjust the spacing with the grab handle on the right of the inserted text where the sample text below states resize here with the arrow pointing to the image below.
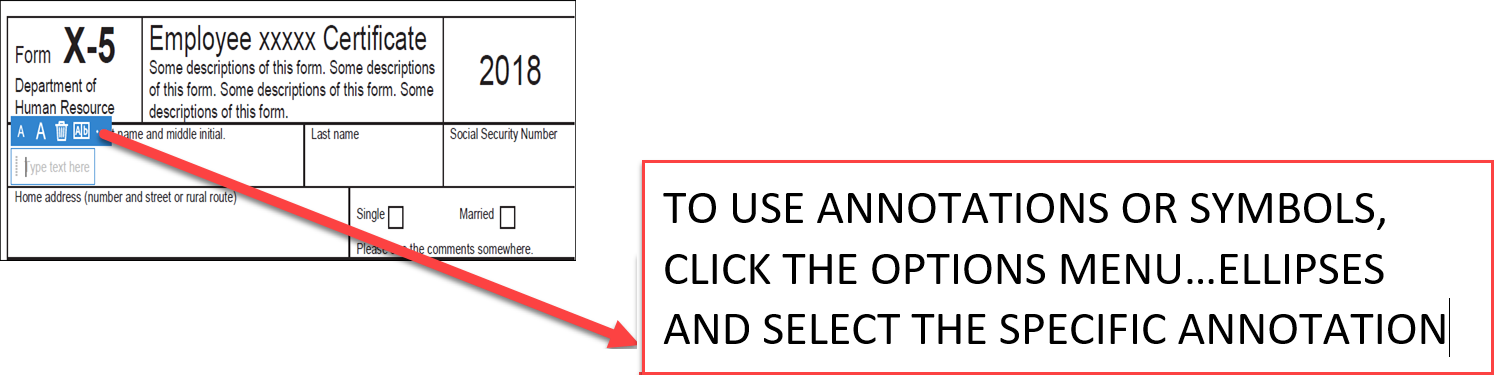
11. To use annotations or symbols, click the Options menu  and select the annotation.
12. Click the Crossmark (X), Checkmark, and Dot to fill in check boxes and radio buttons. Use the Circle to circle the text or the horizontal Line to strike out text. Click on the specific icon in the toolbar to select it, and then click on the form where you want to place the icon.

13. Each click places the selected annotation at the respective location on the form.