How to Set Up Global Protect VPN at Home (iOS / Apple Mobile Devices)
1. Open the App Store
 App Sstore
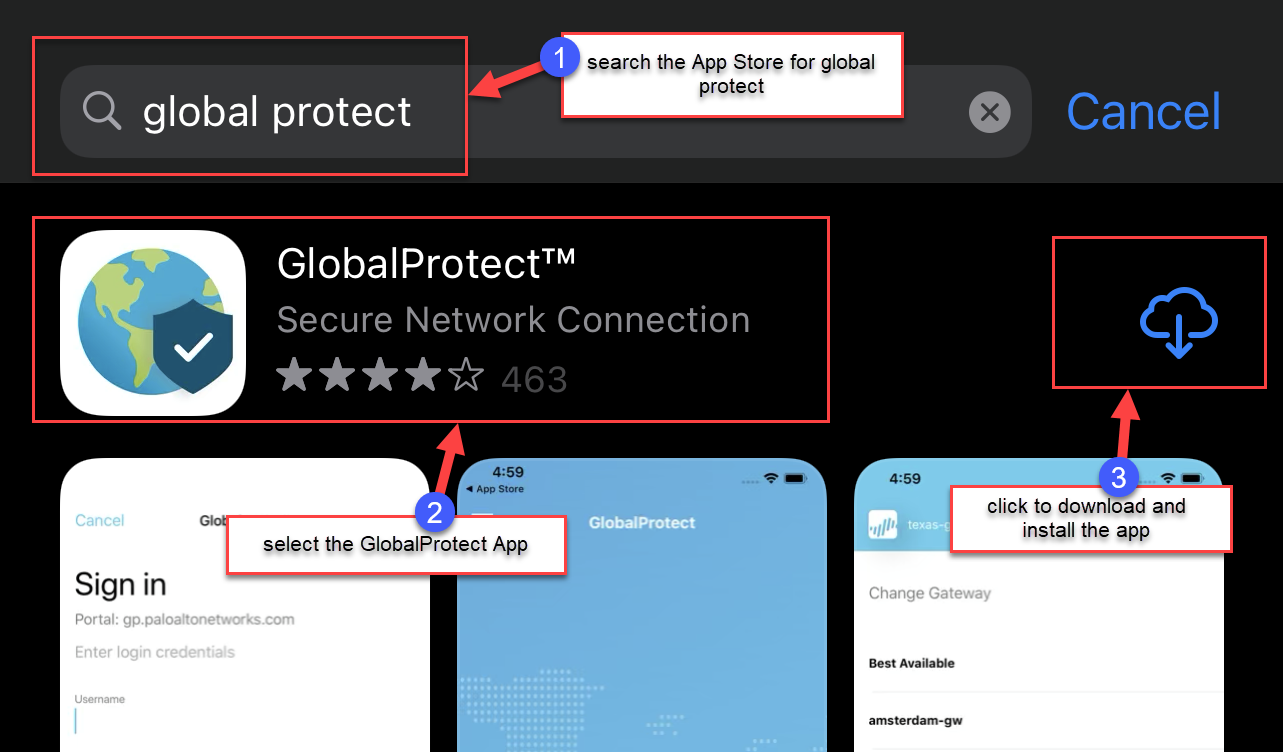
2. Search for global protect, confirm the GlobalProtect app, then click to download and install
 Download
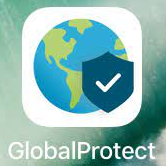
3. Click on the GlobalProtect App to open it
 App
App
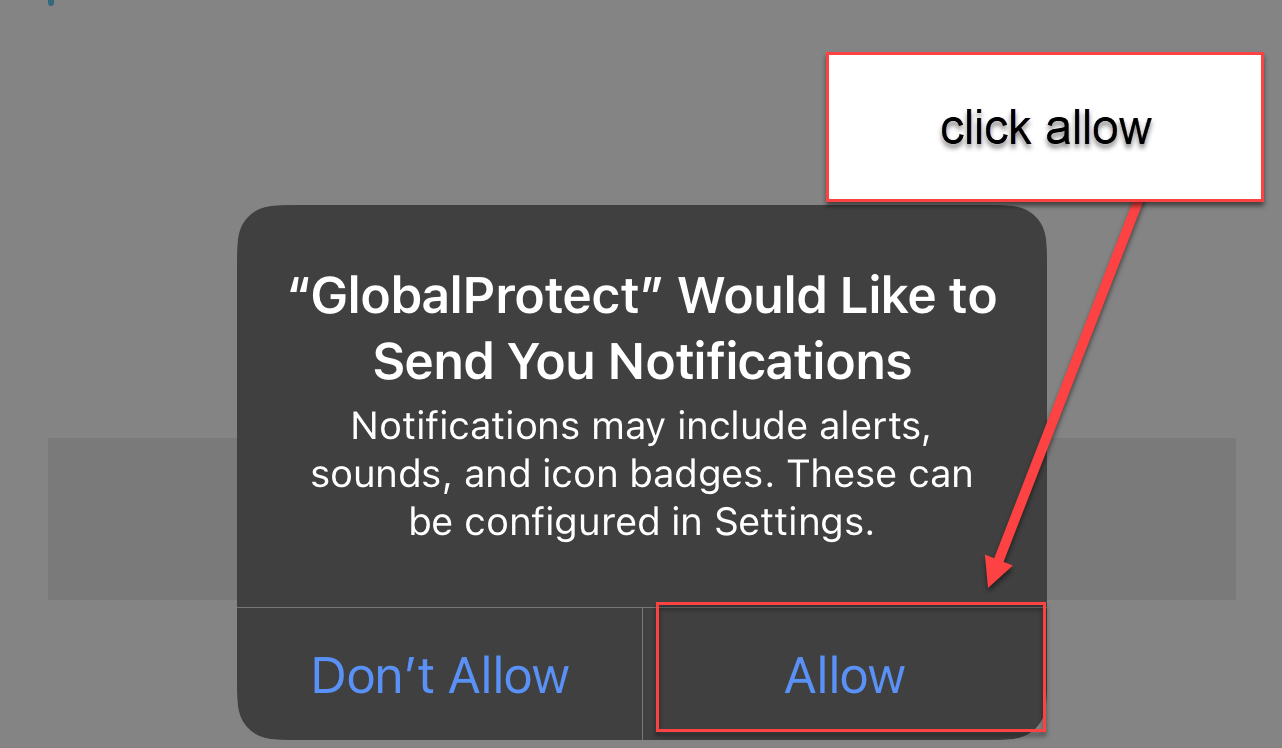
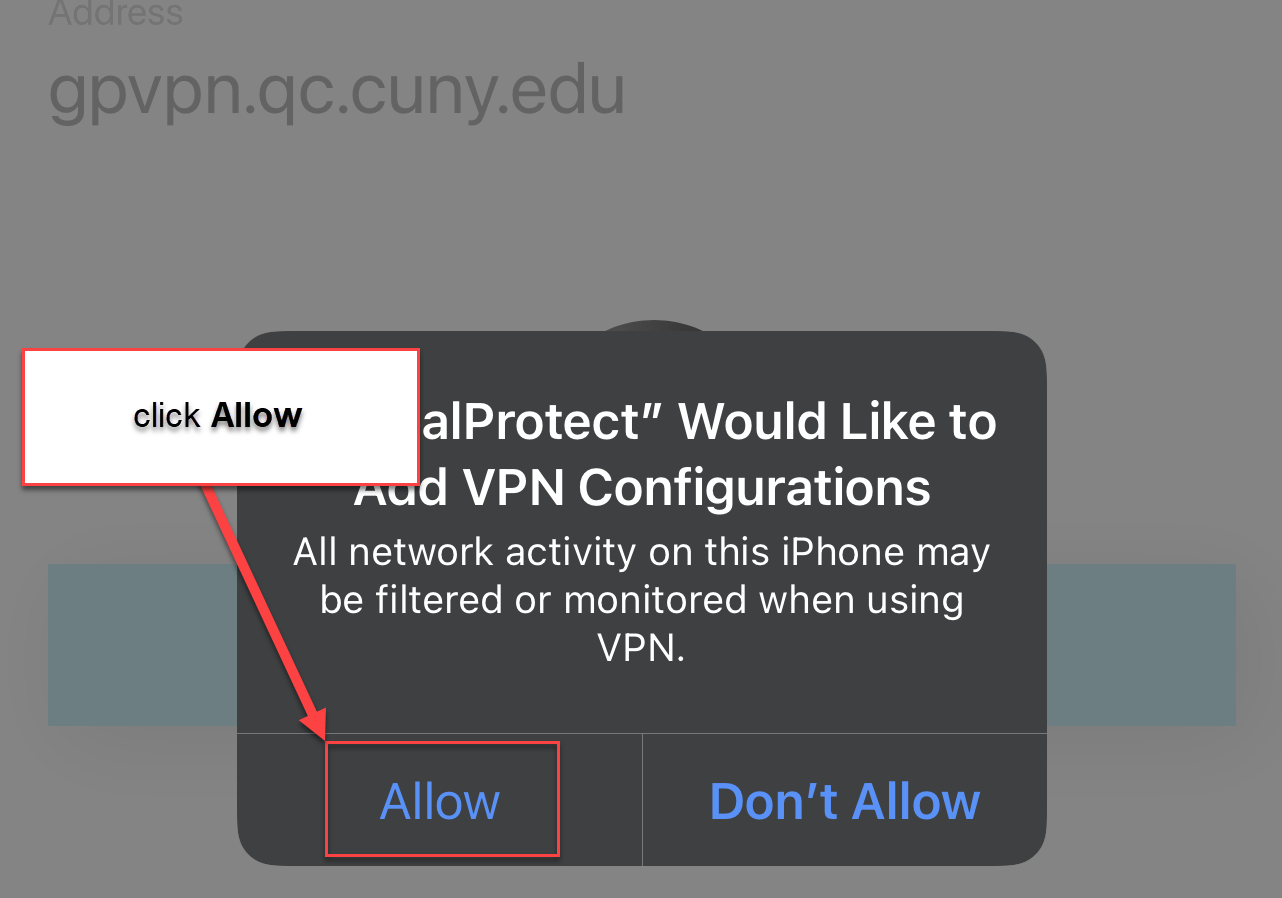
4. Click Allow
 Allow
Allow
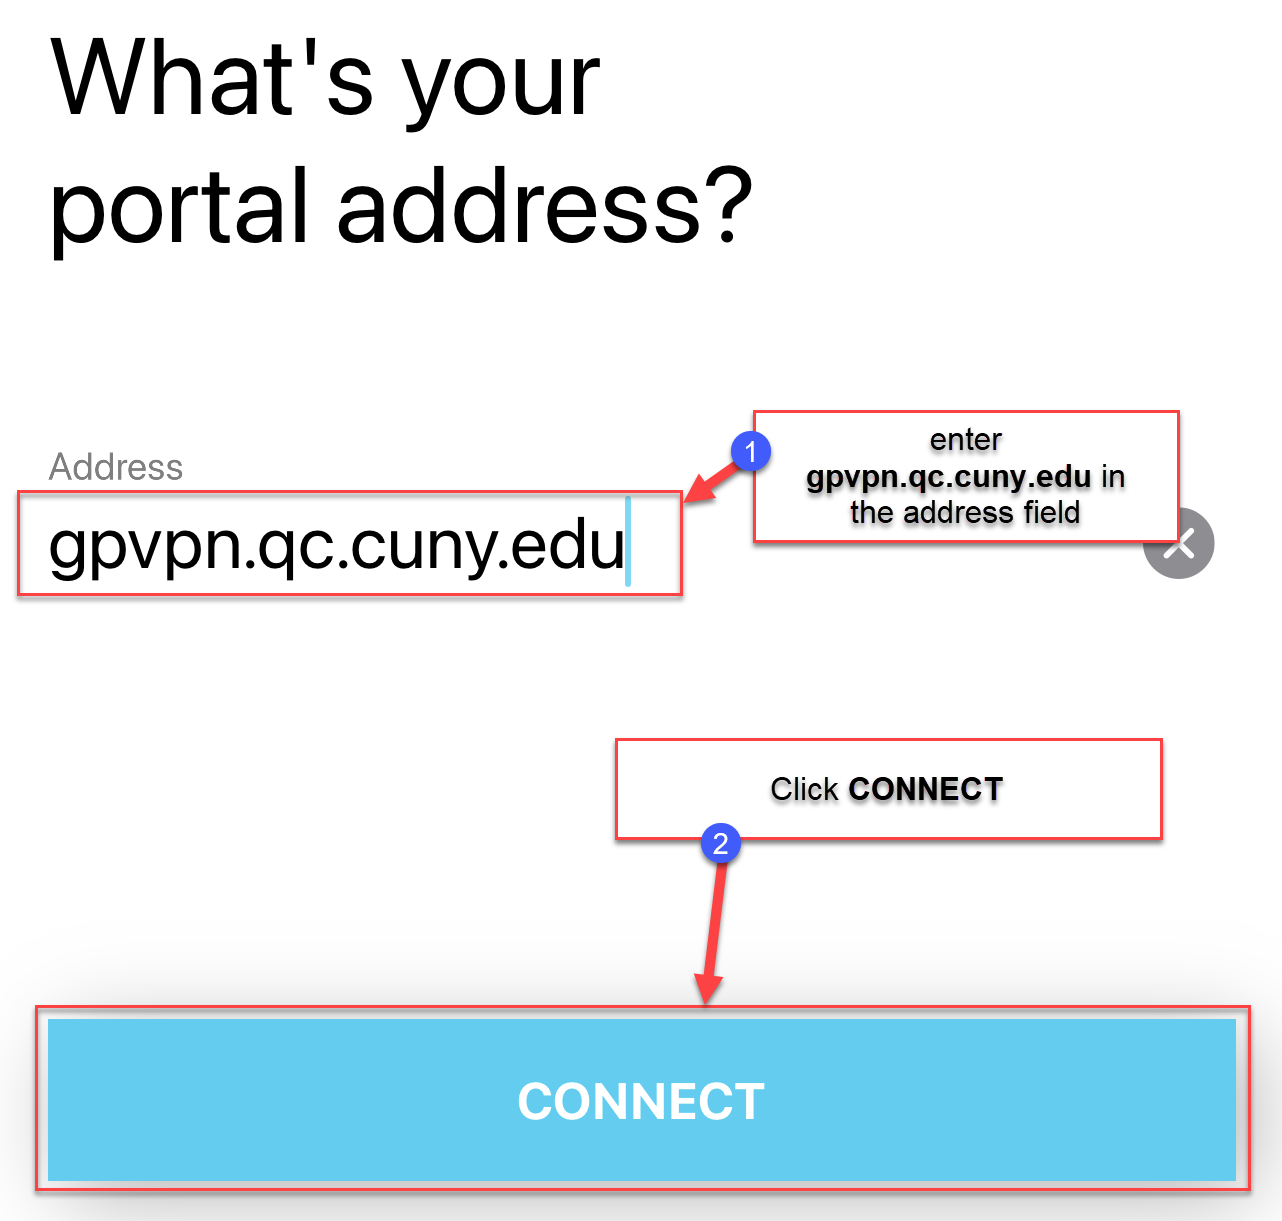
5. Enter gpvpn.qc.cuny.edu in the address field, then click CONNECT
 Connect
6. Click Allow
 Allow
Allow
7. Enter your CUNY Login credentials (first name+last nameNN@login.cuny.edu) in the Username field, enter your CUNY Login password in the password field, then click SIGN IN
 Login Credentials
8. Enter the 6-digit verification code to authenticate CUNY MFA
 TOTP
TOTP
9. You are now connected
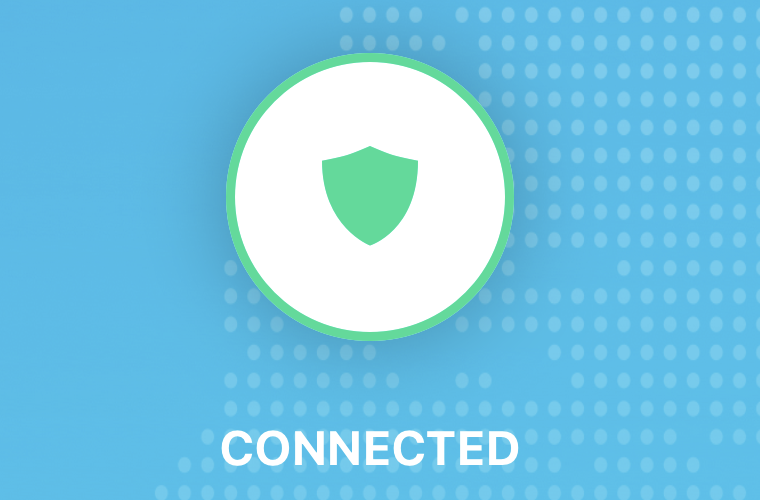 Connected
You will want to disconnect from the QC VPN after you have completed your action on HR/PR assist. To do so:
1. Click on Settings
 Settings
2. Click on General
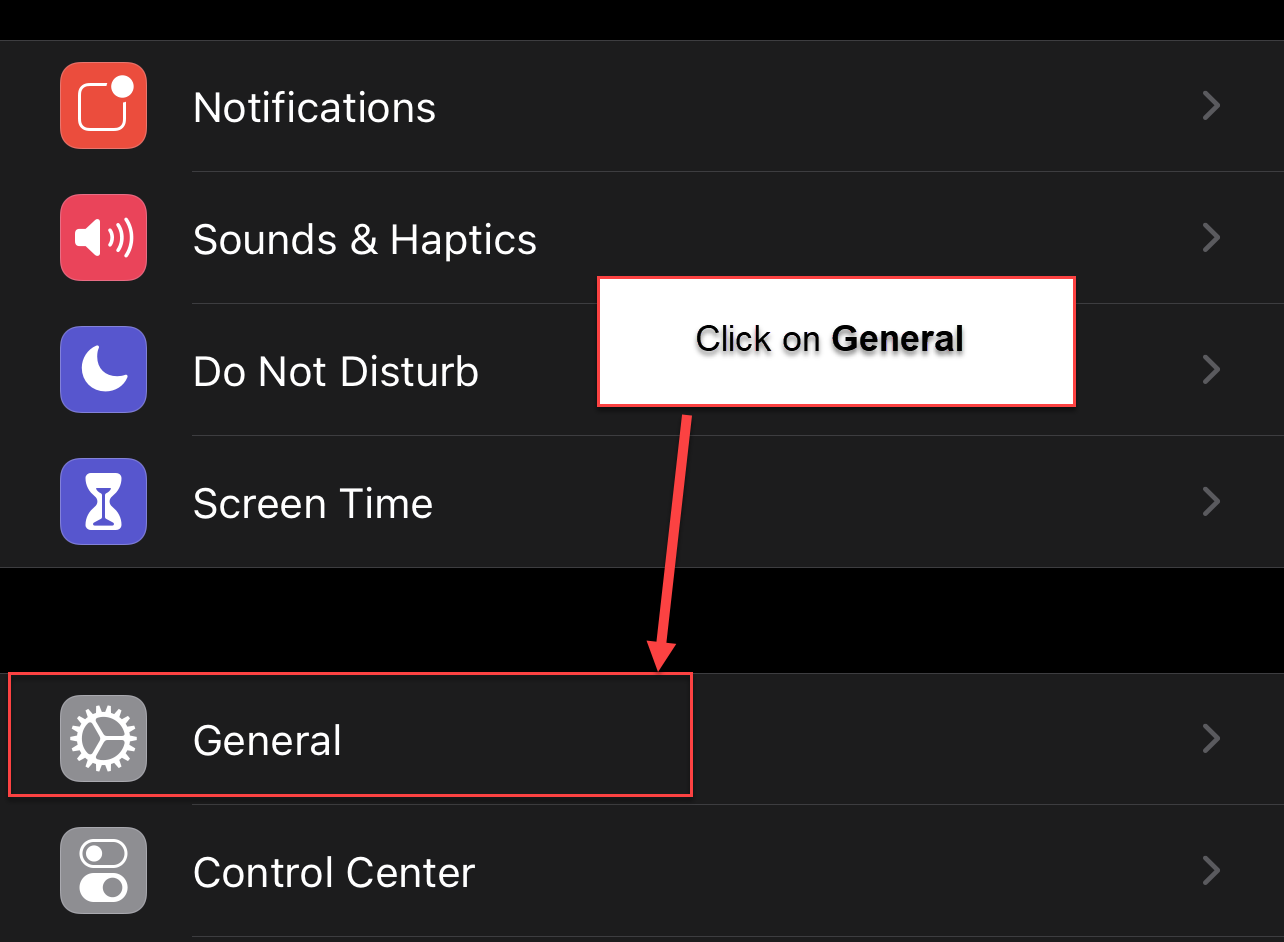 General
3. Click on VPN
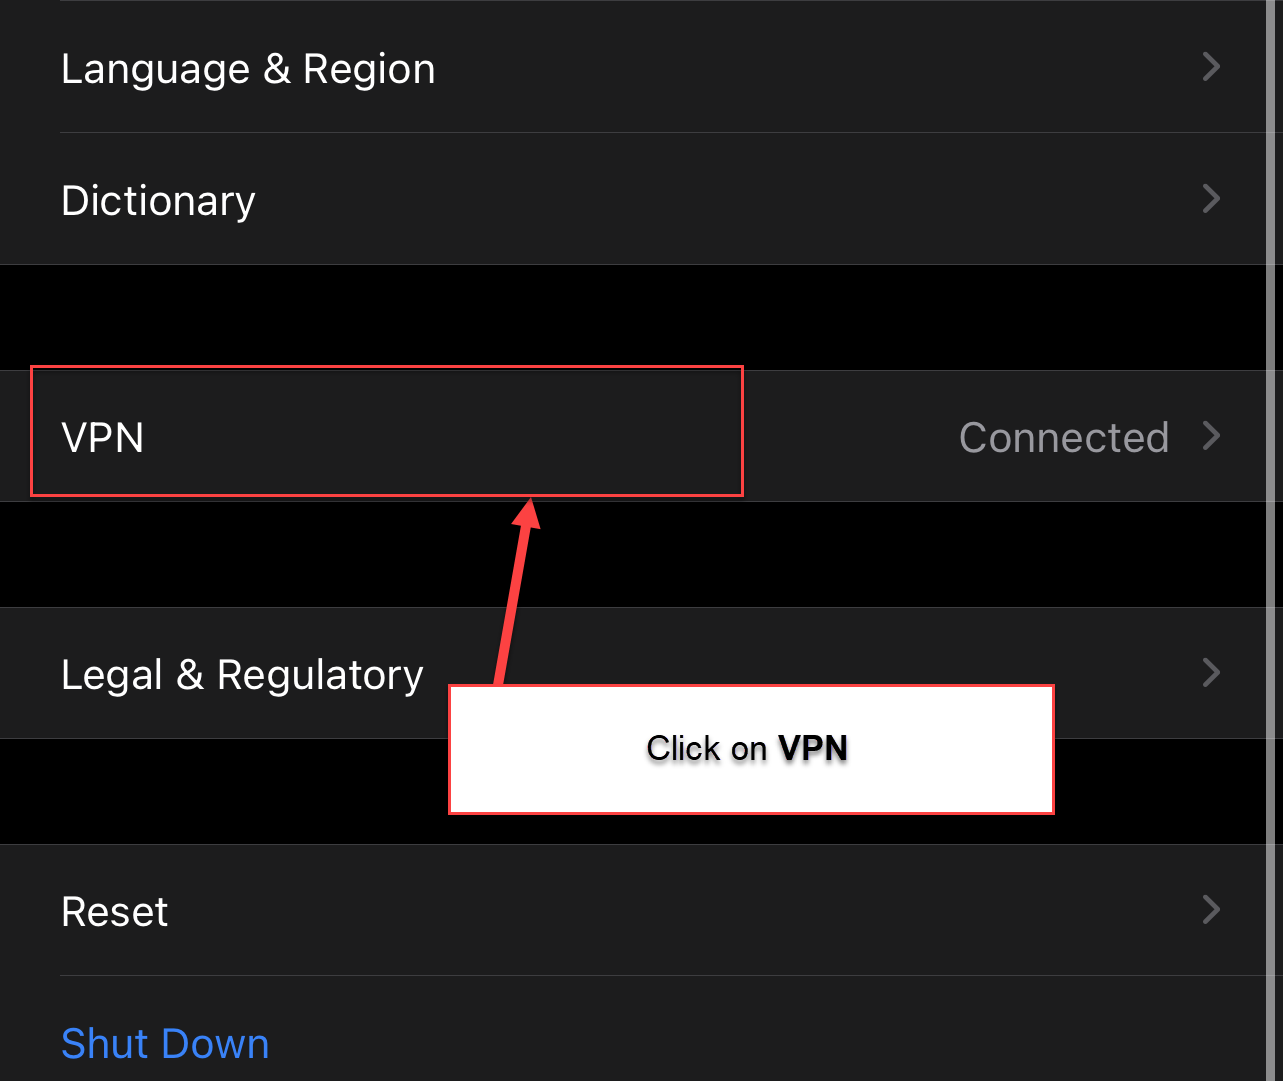 VPN
VPN
4. Click GlobalProtect
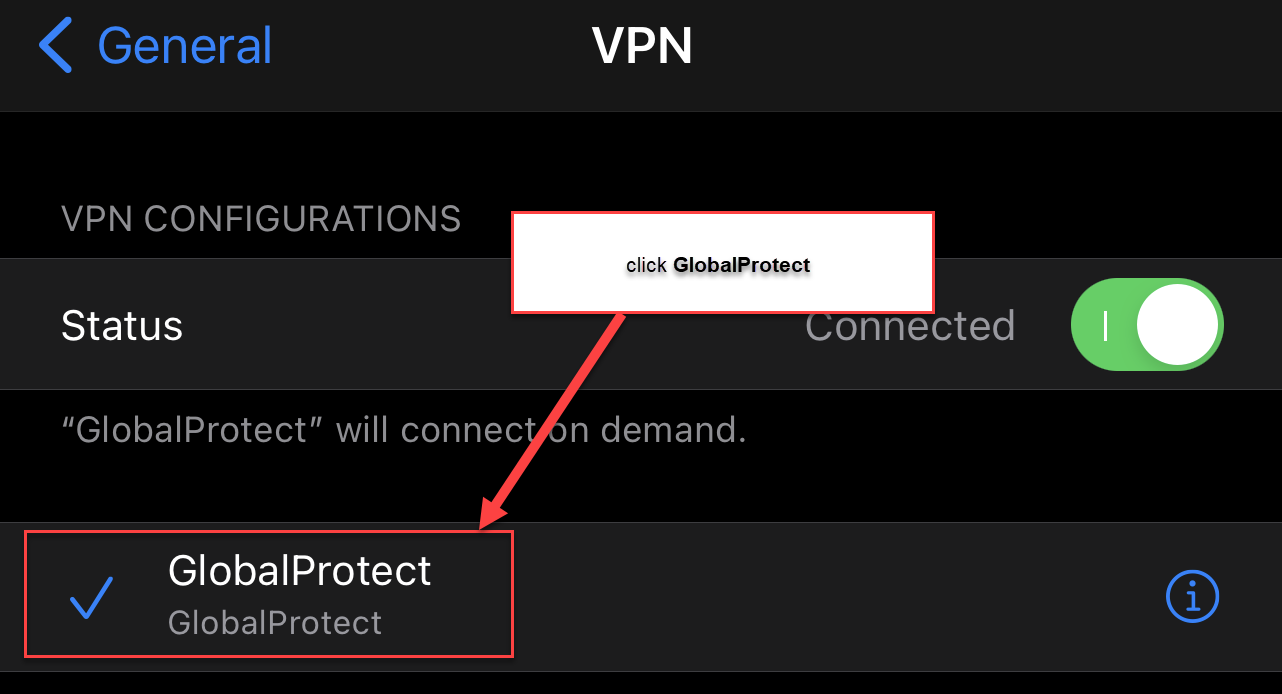 GlobalProtect
5. Check that the Connect On Demand option is turned off (grey), then click < VPN
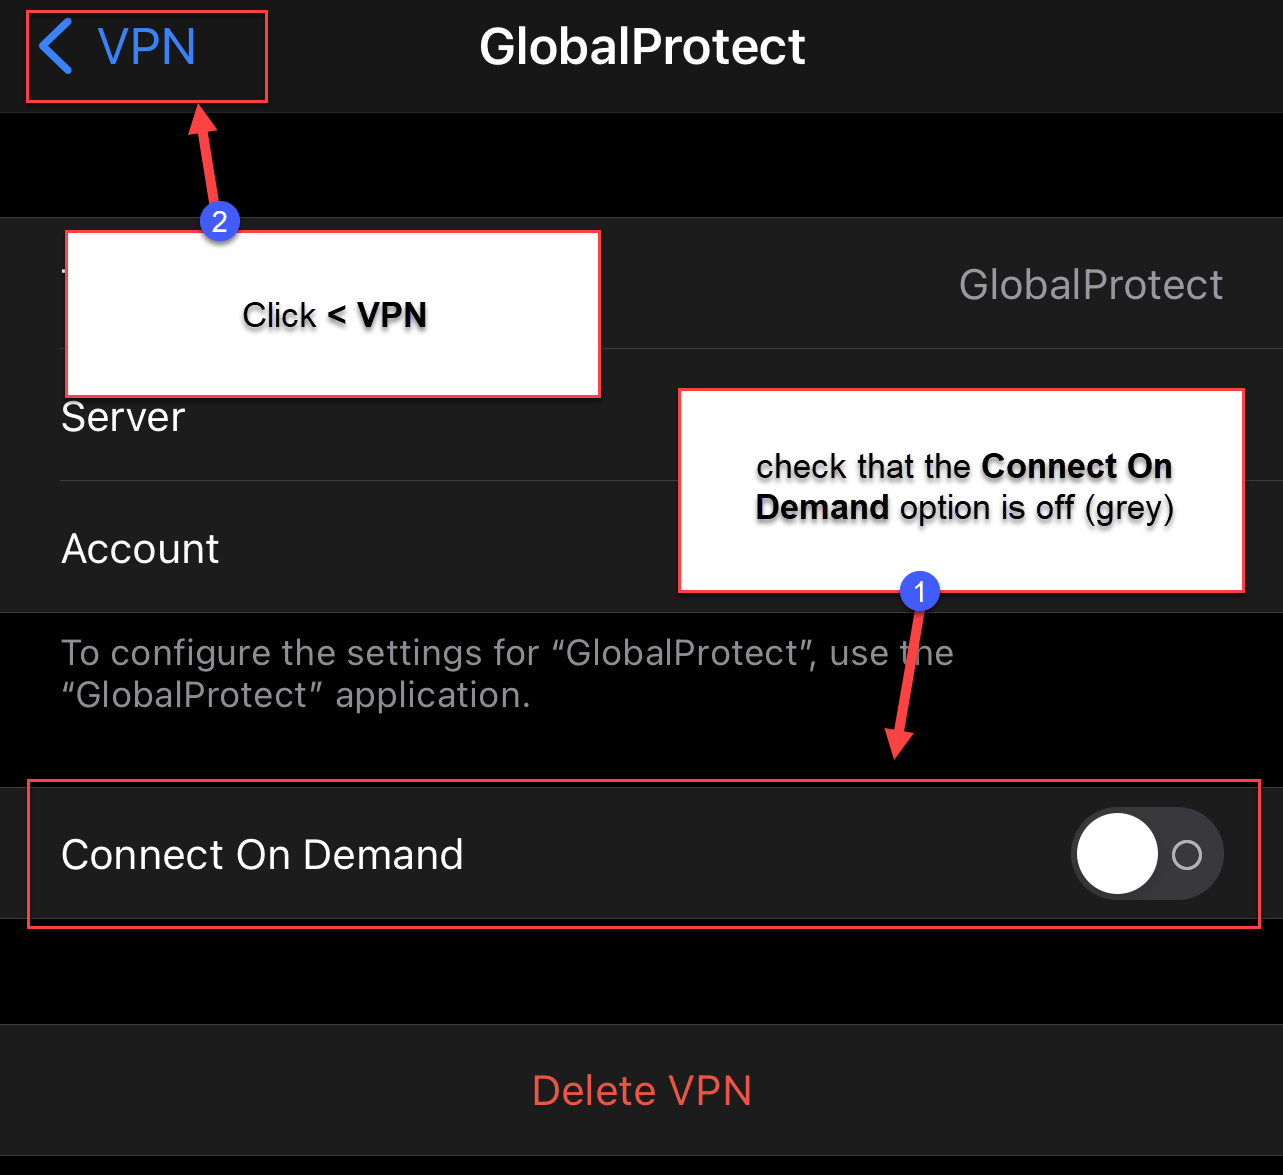 VPN
VPN
6. Click the status toggle to disconnect from the VPN. You can toggle this on again when you want to re-connect to the VPN.
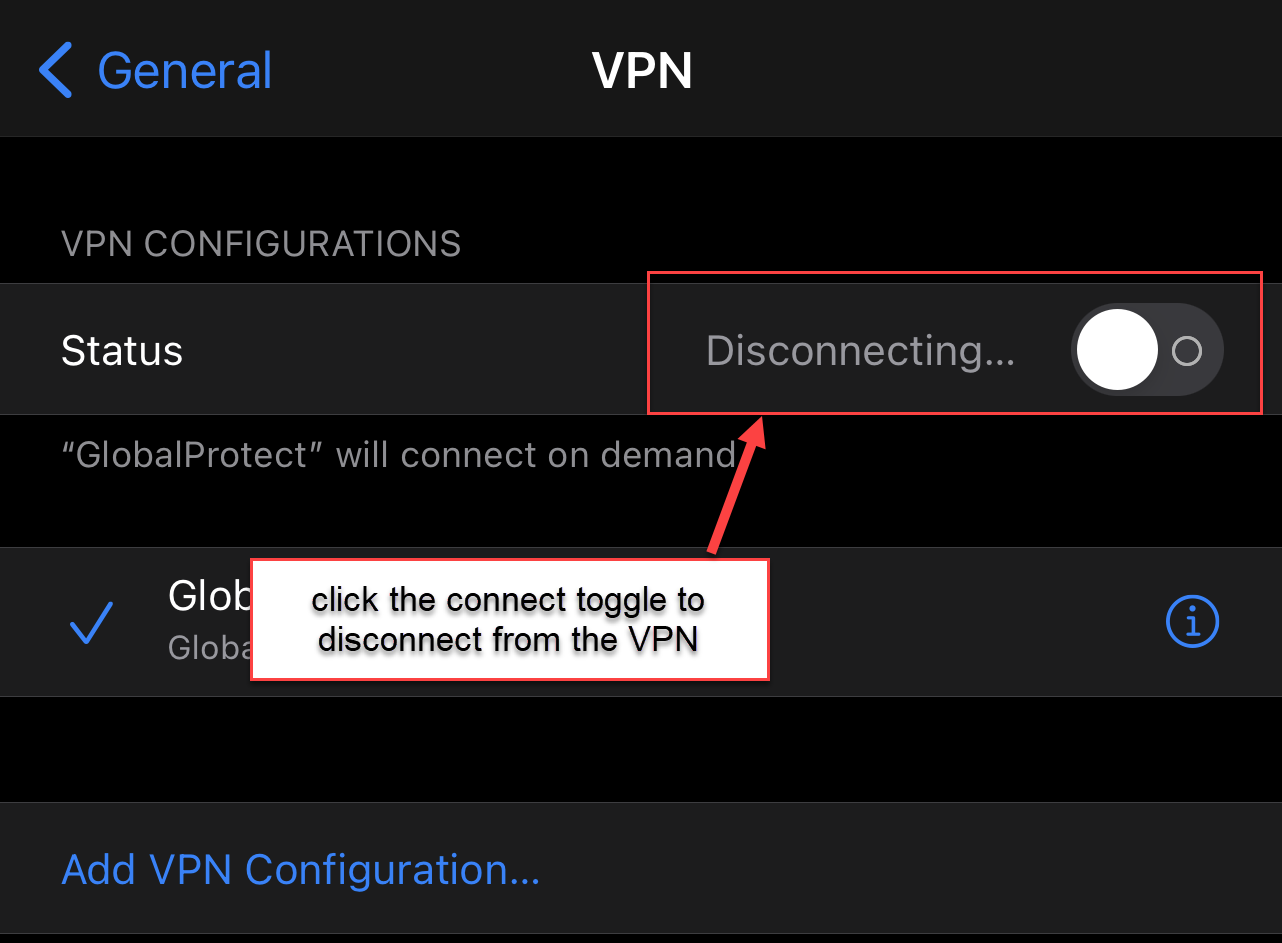 Status Toggle