How to delegate/assign a calendar to another user in the Outlook Web Application (OWA)
1. Open your browser and go to: https://outlook.office.com
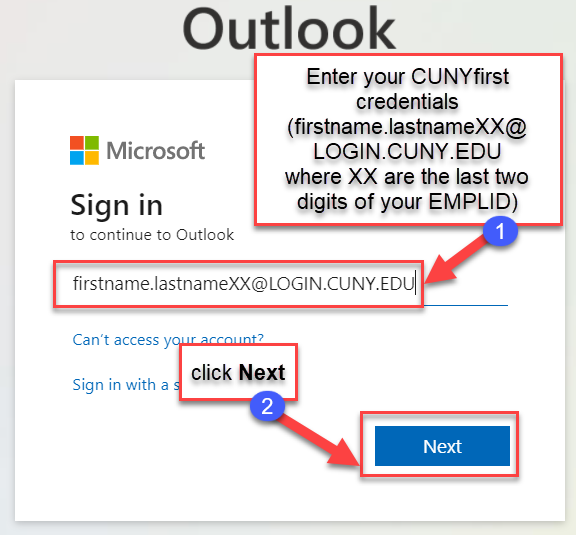
2. Enter your CUNYfirst credentials (firstname.lastnameXX@LOGIN.CUNY.EDU where XX are the last two digits of your EMPLID), then click Next
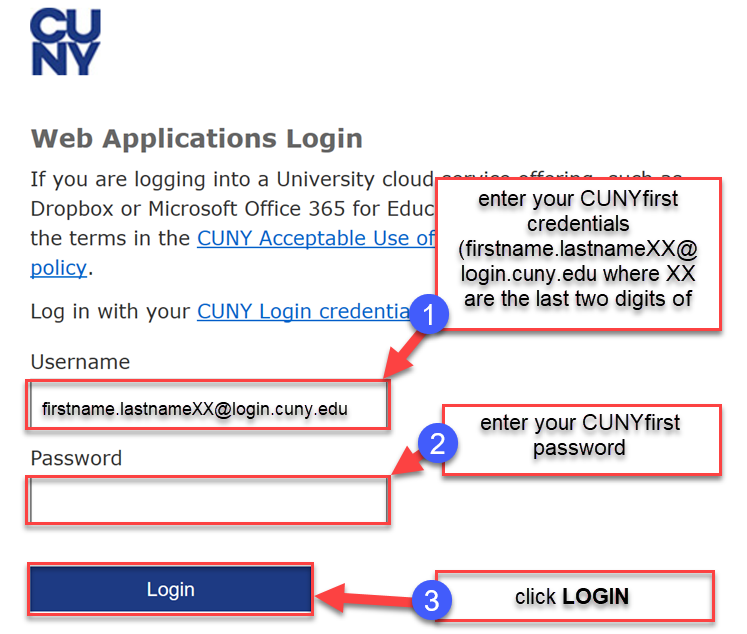
3. You will be prompted to enter your CUNY Credentials (firstname.lastnameXX@login.cuny.edu where XX are the last two digits of your EMPLID) and CUNYfirst password on the CUNY Web Applications Login page, then click LOGIN.
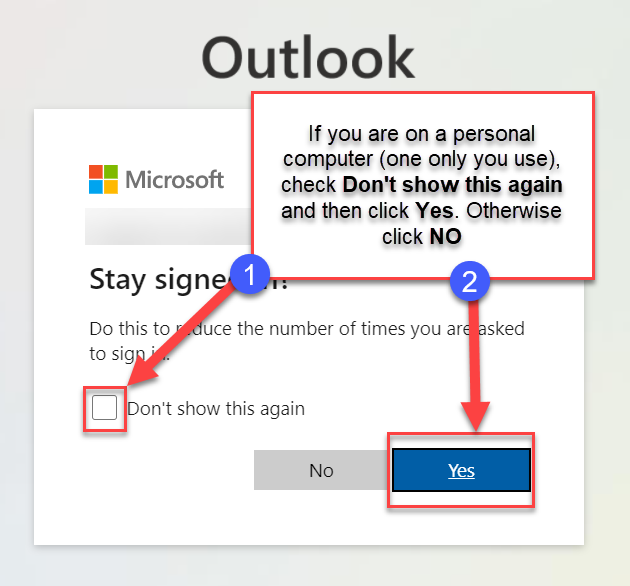
4. If you are on a personal computer (one only you use), check Don't show this again and then click Yes. Otherwise click NO
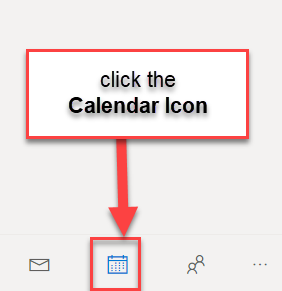
5. Click the Calendar Icon ( ) in the left side navigation panel
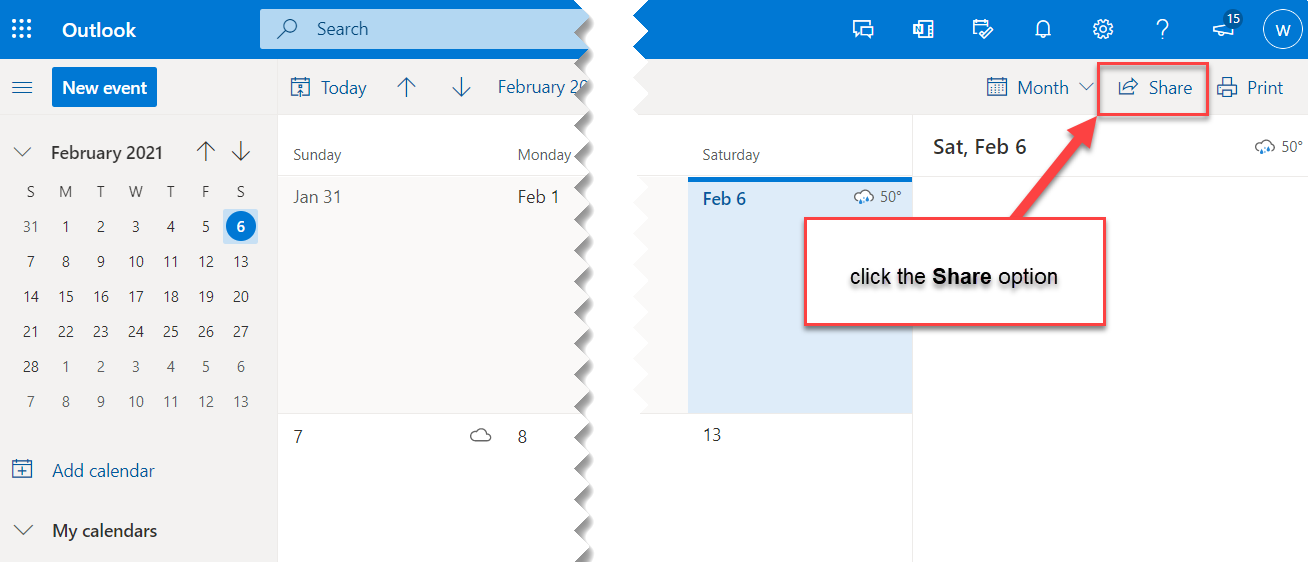
6. Click Share on top right hand side
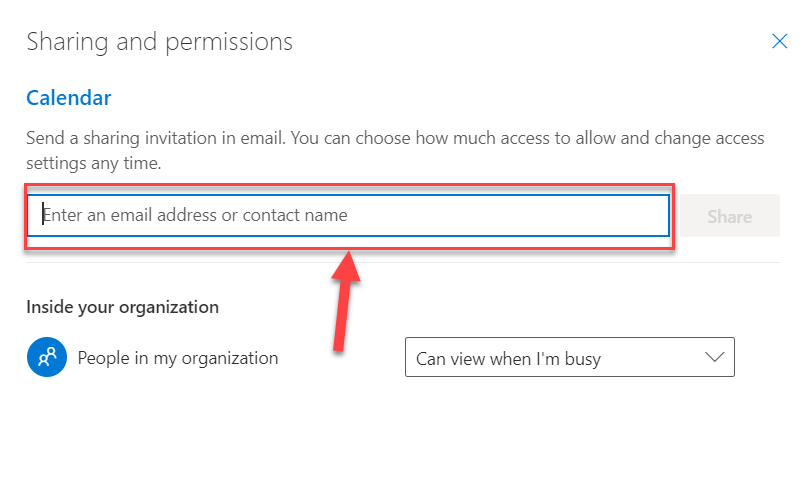
7. Enter email or name of the person you would like to have access to your calendar
8. After selecting the person, click Share. They will be added to your permissions list.
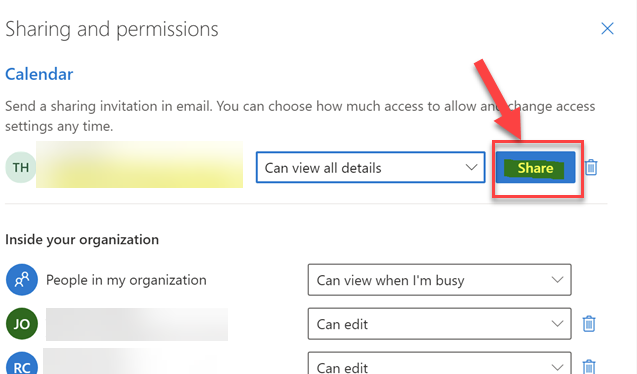
9. You can choose a permission level for each person you add
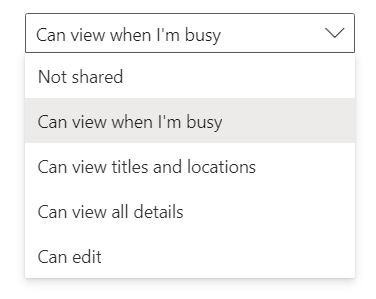
Permission levels explained:
Can view when I’m busy - Allows someone to view blocks of time as “Free,” “Busy,” “Tentative,” and “Away.”
Can view titles and locations - Allows someone to view your “Subject” and “Location.” Events set to private will only display as “Private Event.”
Can view all details - Allows someone to view your “Subject,” “Location,” “Attendees,” and “Description.” However, any event you mark as private displays simply as “Private Event.”
Can edit - Provides read/write/modify access.