How to Delegate Calendar Permissions to another user in M365 Outlook (MacOS)
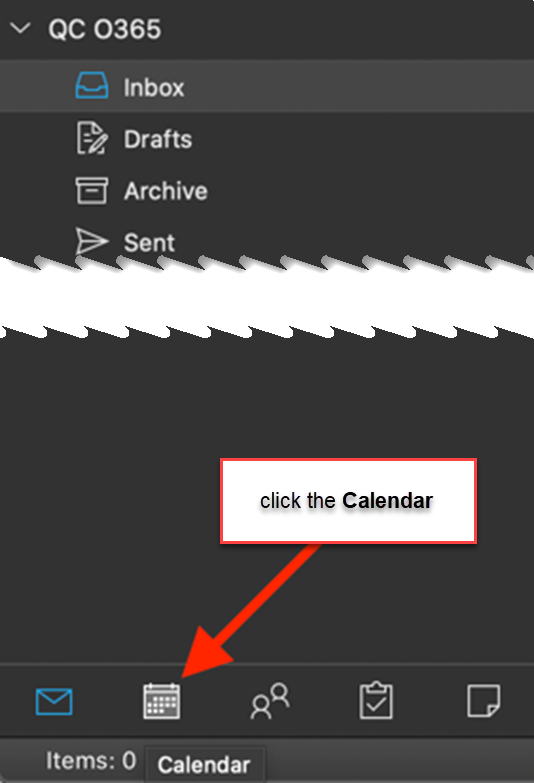
1. Click on the Calendar icon at the bottom left of the Outlook Client
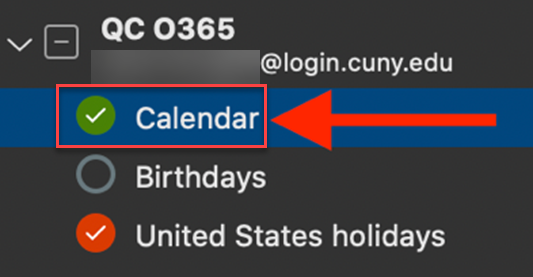
2. Select your calendar
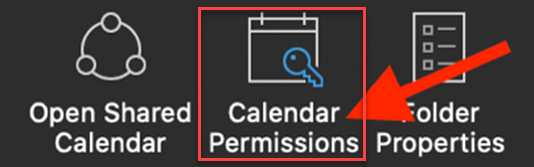
3. Then click on Calendar Permissions at the top on the Ribbon:
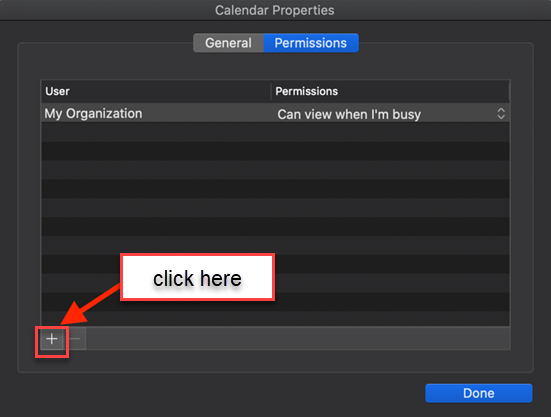
4. Click on the ”+” button
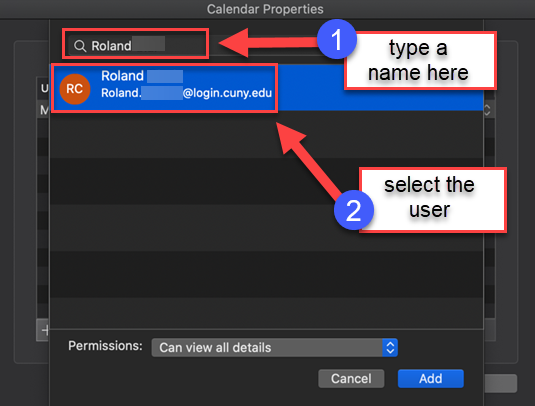
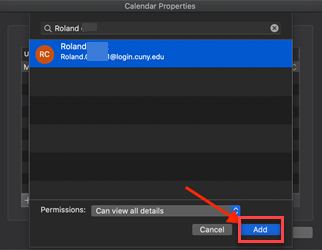
5. Search for the user to whom you want to delegate access by typing their name in the search field then selecting them
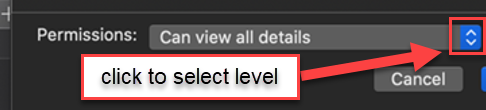
6. Click the dropdown arrow to select levels
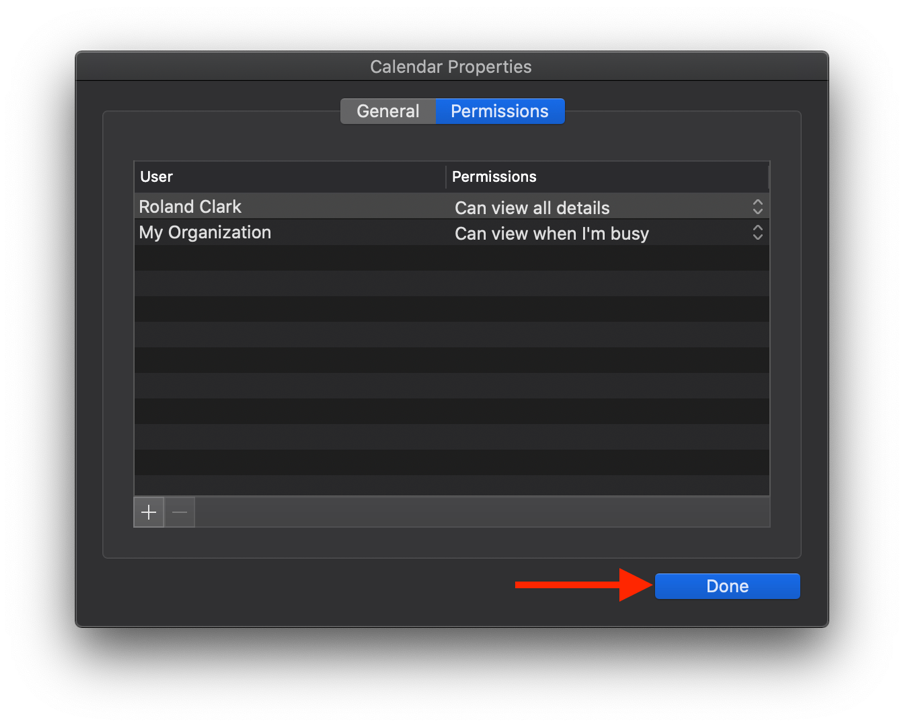
7. Permission levels explained:
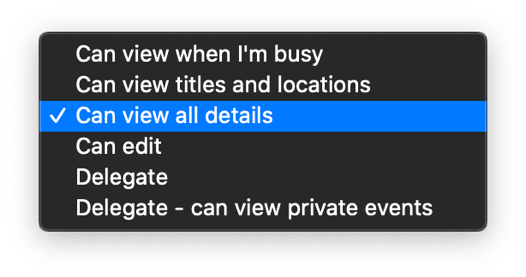
Can view when I’m busy - Allows someone to view blocks of time as “Free,” “Busy,” “Tentative,” and “Away.”
Can view titles and locations - Allows someone to view your “Subject” and “Location.” Events set to private will only display as “Private Event.”
Can view all details - Allows someone to view your “Subject,” “Location,” “Attendees,” and “Description.” However, any event you mark as private displays simply as “Private Event.”
Can edit - Provides read/write/modify access.
Delegate – Allows someone to act on your behalf regarding events. includes Can edit permissions. Events set to private will only display as “Private Event.”
Delegate – can view private events - Allows someone to act on your behalf regarding events. Can view private events.
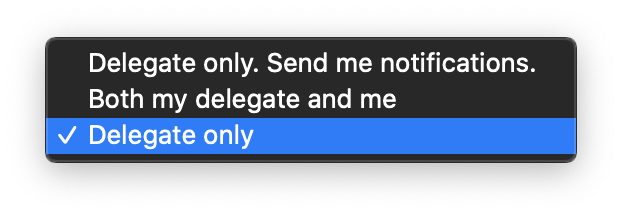
Note: When selecting either Delegate options you are presented with Delegate notification settings:

8. Select your permission/delegate level then click Add
9. Click Done: