How to Create a new contact in M365 Outlook (Windows)
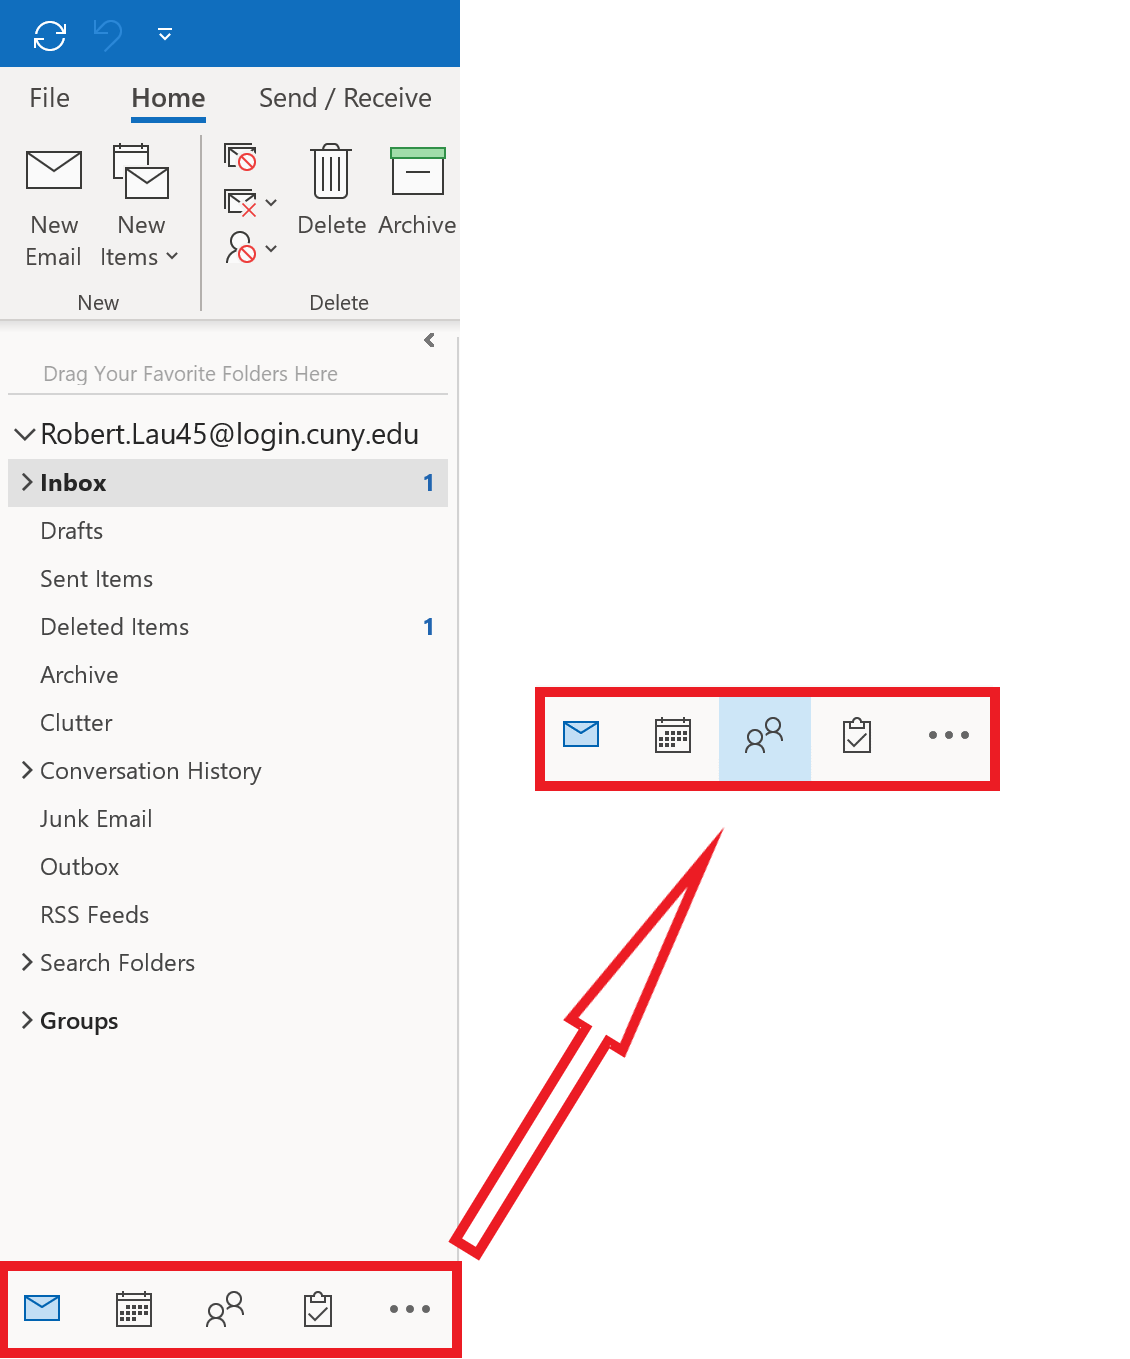
1. Click on the  icon, located at the bottom left of your Outlook client, to access Contacts
2. To create a new contact, click on New Contact from the Ribbon.

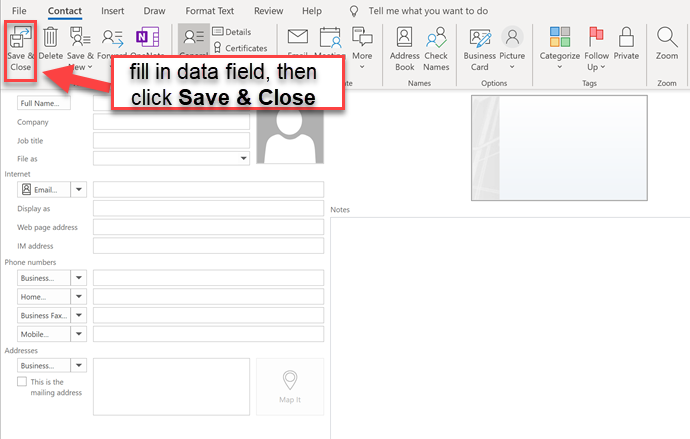
3. Enter the information for your contact in the fields provided, the click Save & Close