How to Import an email backup file (.pst) into M365 Outlook (Windows)
1. Open the M365 Outlook Client

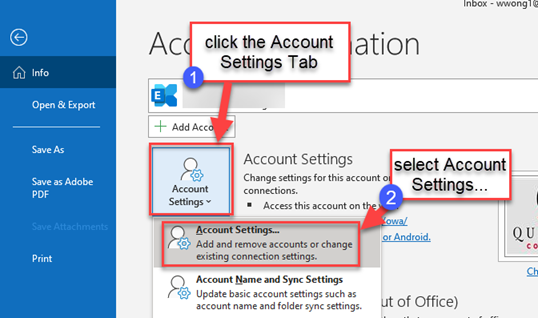
2. Click on File

3. Click Account Settings, then click Account Settings...
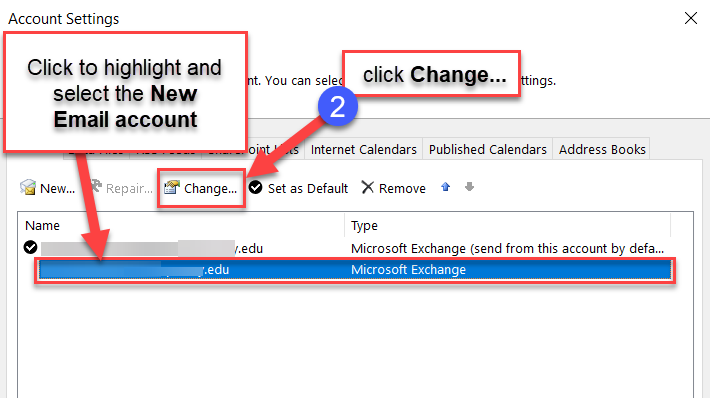
4. Select your New email account, then click Change...
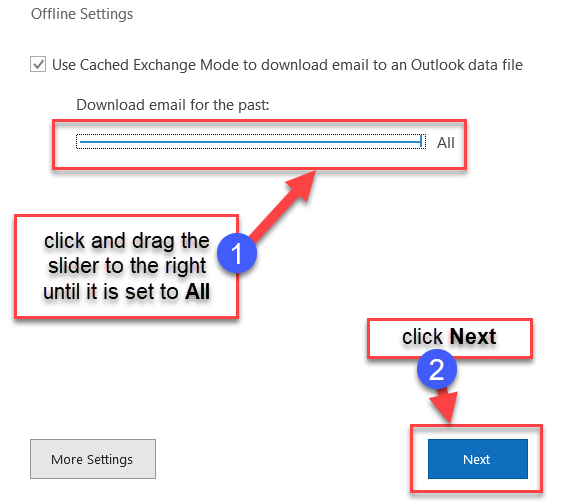
5. Click and drag the slider to the right until it is set to All, then click Next
6. Click Done

7. Restart the M365 Outlook App
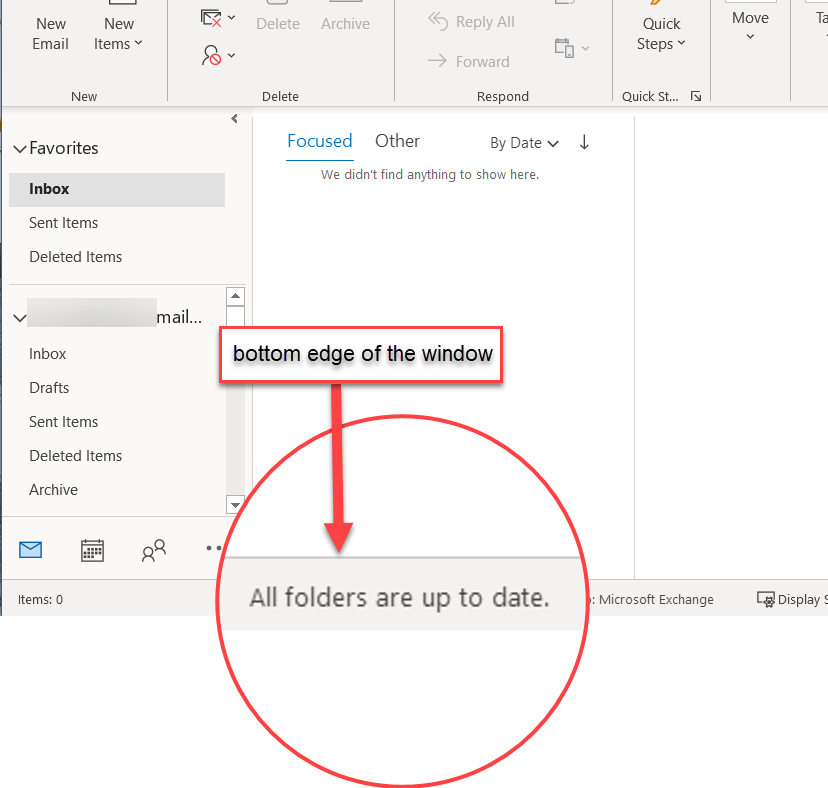
8. Look at the bottom of the Outlook window, when you see All folders are up to date. you can move on to the next steps. This can take a few hours, the process will continue as long as the Outlook app is connected to the internet and open (even in the background).
9. Click on File

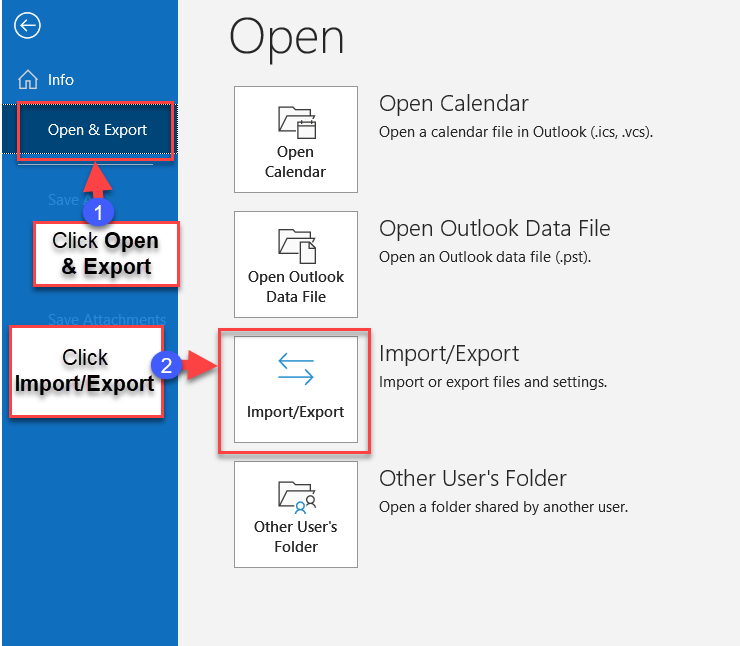
10. Click on Open & Export, then click on Import/Export
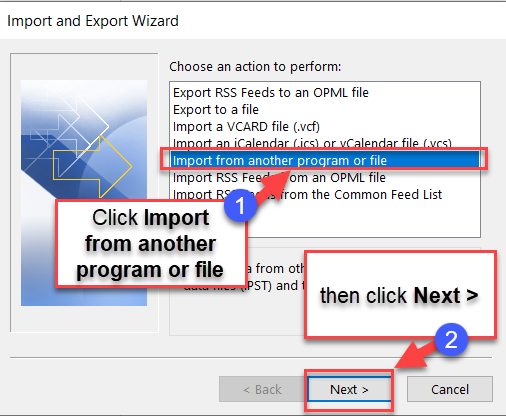
11. Click on Import from another program of file, then click on Next >
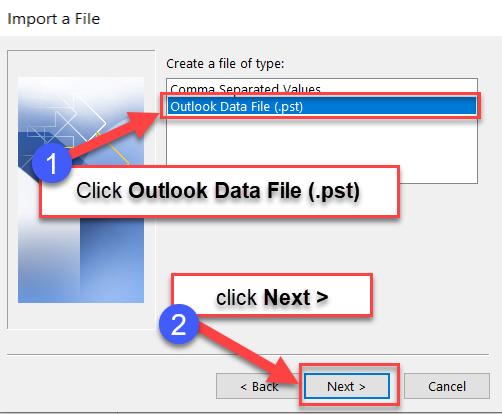
12. Click on Outlook Data File (.pst), then click Next >
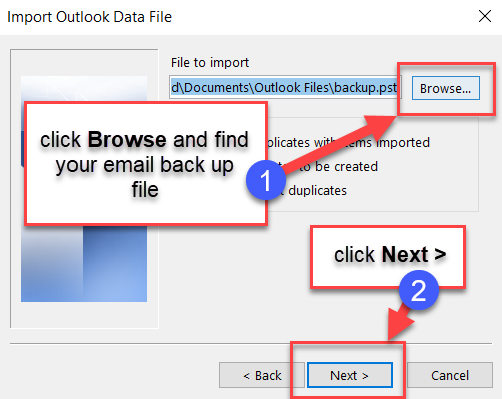
13. Click on Browse and find your email back up file, if used a password you will be prompted to enter it. Then, click Next >
14. Click the dropdown arrow, then select your New Email Account, then click Finish

15. Please be patient as your old QC email content is synced to your new QC email. Look at the bottom of the Outlook window, when you see All folders are up to date. your email has been updated. This can take a few hours, the process will continue as long as the Outlook app is connected to the internet and open (even in the background).
