1 - Getting Started with M365 Outlook after the Email Cutover (Mac)
After the email cutover you will need to take some steps to properly set up your email client.
You can follow these steps using Microsoft 365/Office 365 or Office 2019. Please note that you may see some graphical differences between those programs, but the steps will remain the same.
Using Windows (PC) Outlook App? [click here]
Using the Outlook Web Application? [click here]
Using an iOS (Apple) Device? [click here]
Using an Android Device? [click here]
STEP ONE: REMOVING YOUR ACCOUNTS:
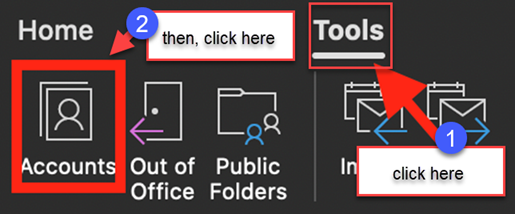
1. Click on Tools and then Accounts in the Ribbon
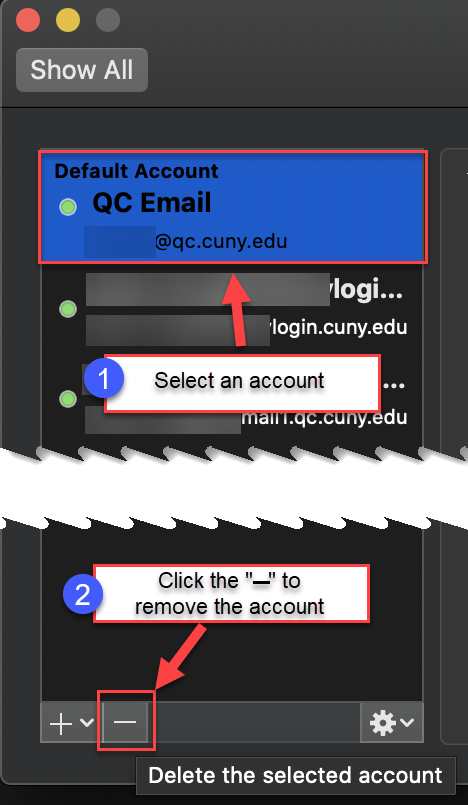
2. Select an account then, Click on the — to remove the account
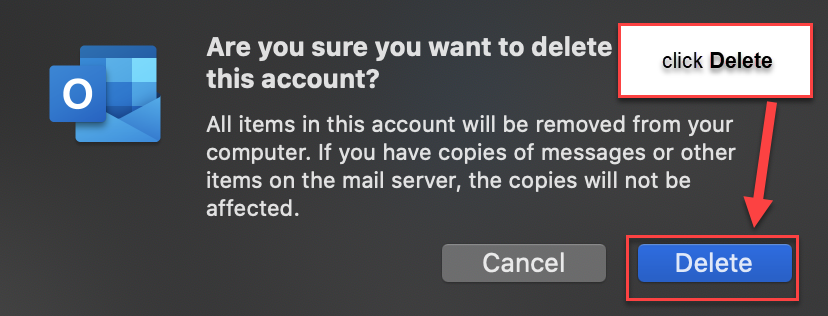
3. When the pop warning appears, click Delete
4. Repeat these steps to remove all your other accounts
5. Restart your Outlook client to apply the changes. You may notice a longer than usual start up sequence as your account is updated
STEP TWO: ADDING YOUR NEW ACCOUNT:
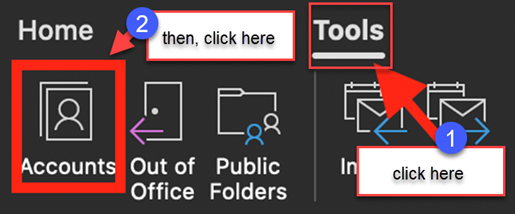
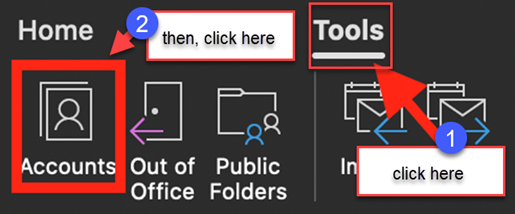
6. Click on Tools and then Accounts in the Ribbon
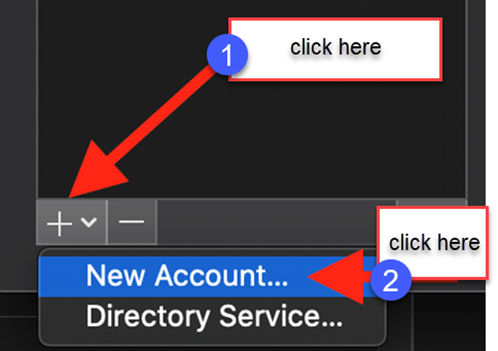
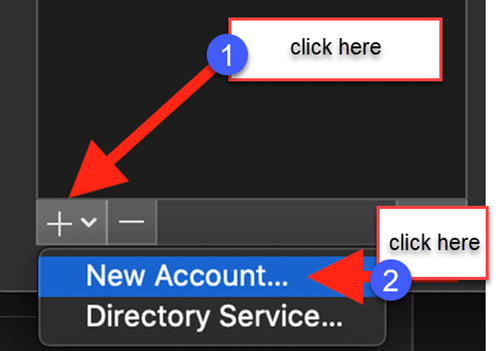
7. Click on + and then New Account
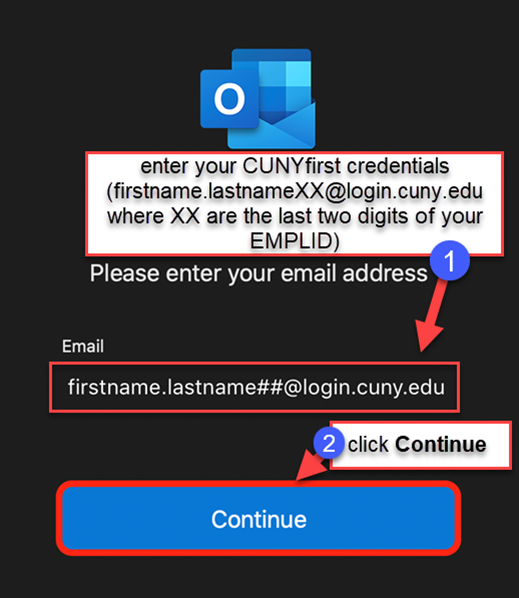
8. Enter your CUNYfirst credentials (Firstname.LastnameXX@login.cuny.edu where XX are the last two digits of your EMPLID) and click Continue
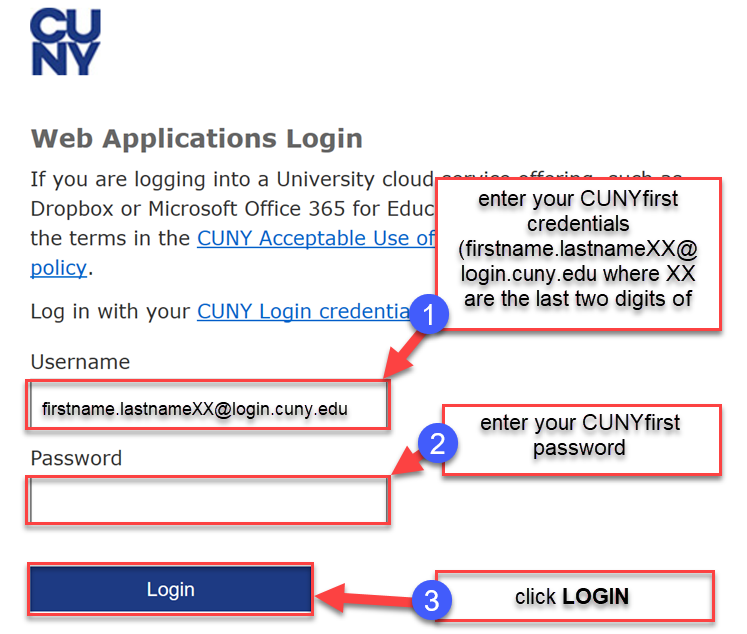
9. You will be prompted to enter your CUNY Credentials (firstname.lastnameXX@login.cuny.edu where XX are the last two digits of your EMPLID) and CUNYfirst password on the CUNY Web Applications Login page, then click LOGIN.
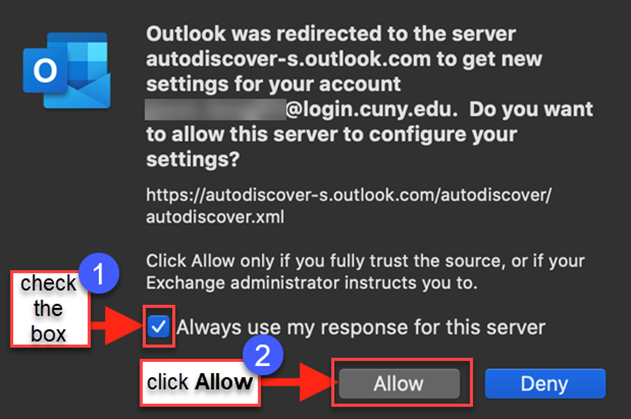
10. You may get a prompt to allow Outlook to redirect to autodiscover-s.outlook.com, check the box and click Allow. If you do not, please move on to the next step.
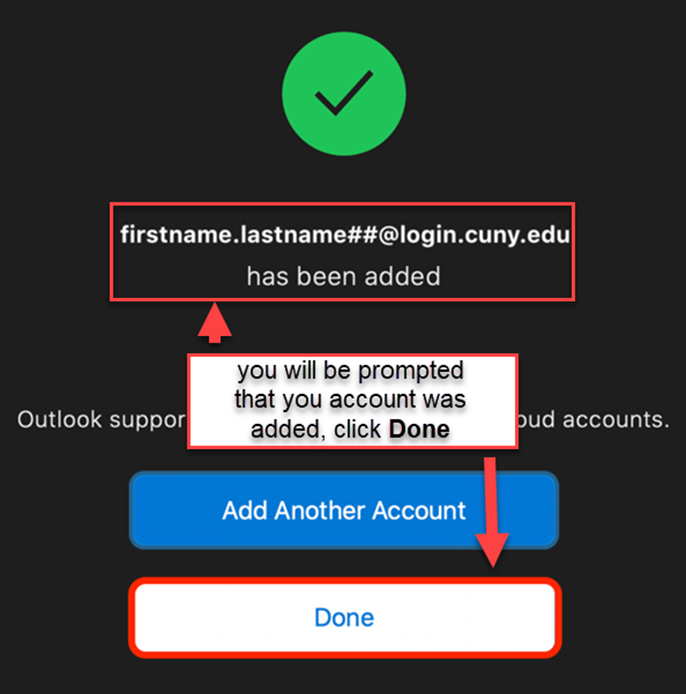
11. You will see a confirmation screen when the account has been added, click Done
12. Restart your Outlook client to apply the changes. You may notice a longer than usual start up sequence as your account is updated
STEP THREE: ADDING YOUR OLD QC EMAIL ACCOUNT:
13. Click on Tools and then Accounts in the Ribbon
14. Click on + and then New Account
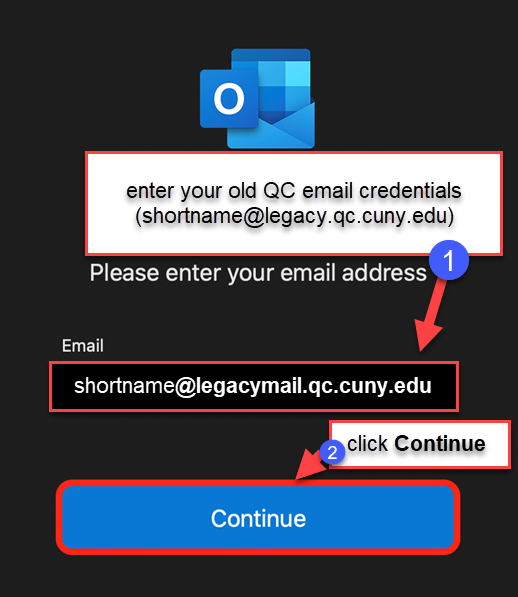
15. Enter your old QC email account (shortname@legacymail.qc.cuny.edu) and click Continue
16. You may get a prompt to allow Outlook to redirect to autodiscover-s.outlook.com, check the box and click Allow. If you do not, please move on to the next step.
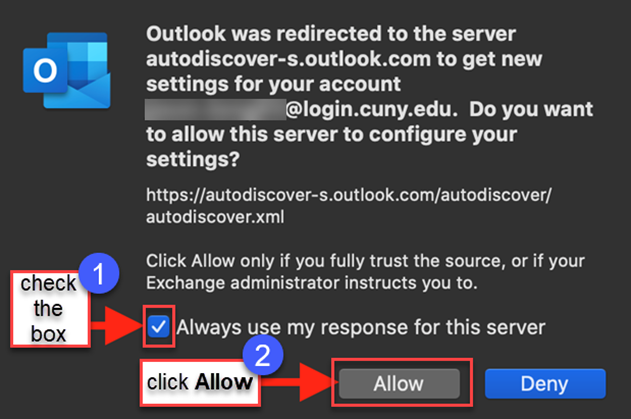
17. Enter QC\firstinitiallastname in the DOMAIN\username or Email field, enter your old QC email password, then click Add Account
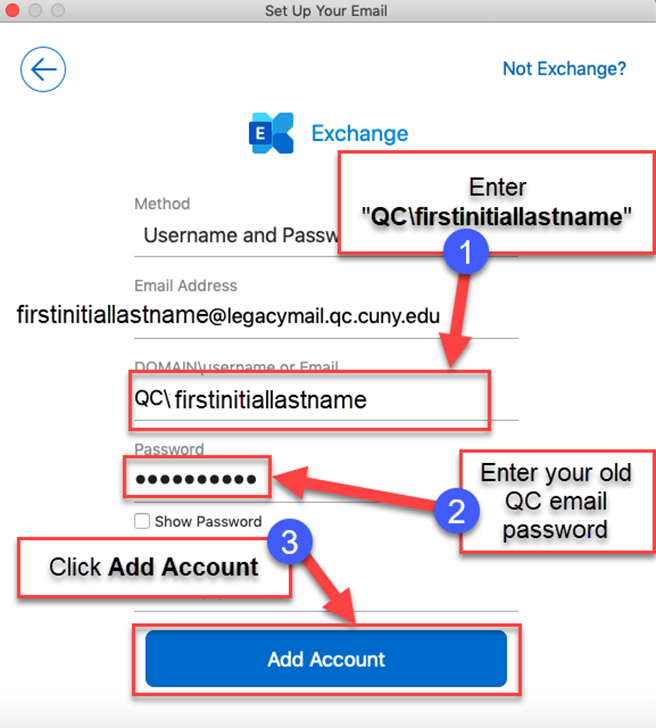
18. You will see a confirmation screen when the account has been added, click Done
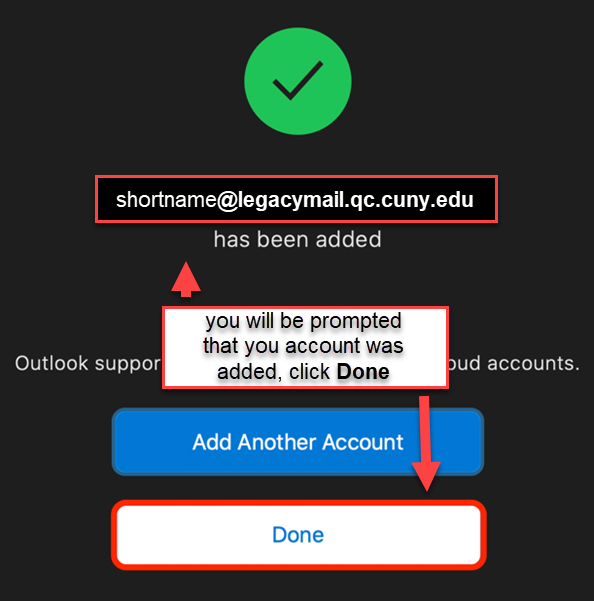
19. Restart your Outlook client to apply the changes. You may notice a longer than usual start up sequence as your account is updated
Note: the old mail will take some time to sync data, you can still use the App at this time but you can also
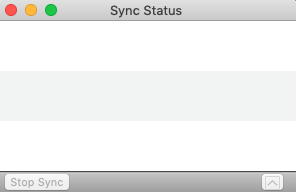
check the status of this import by click on Window then Sync Status

If the Sync Status Window is empty your folders are all up to date
Congratulations! Your accounts are now ready to be used.
You can now export a backup file of your old mailbox to merge into your new mailbox. Check out how by [clicking here]