How to export an email backup file (.pst) into M365 Outlook (Windows)
1. Open the M365 Outlook App

2. Click File

3. Click Account Settings, then click Account Settings...

4. Select your old QC email account, then click Change...

5. Click and drag the slider to the right until it is set to All, then click Next

6. Click Done

7. Restart the M365 Outlook App
8. Look at the bottom of the Outlook window, when you see All folders are up to date. you can move on to the next steps. This can take a few hours, the process will continue as long as the Outlook app is connected to the internet and open (even in the background). DO NOT PROCEED UNTIL YOU SEE the status is All folders are up to date and no other words appear.

9. Click File

10. Click on Open & Export on the left-hand navigation pane

11. Click the Import/Export button

12. Click to select Export to a file, then click Next >

13. Click to select Outlook Data File (.pst), then click Next >

14. Click to select your old QC email account (@legacymail.qc.cuny.edu). Please note you may have to scroll down to find it. Then, click Next >

15. Click Browse

16. Select a Save Location, by default the backup file will save in …My Documents/Outlook Files. Enter a memorable filename, then click OK

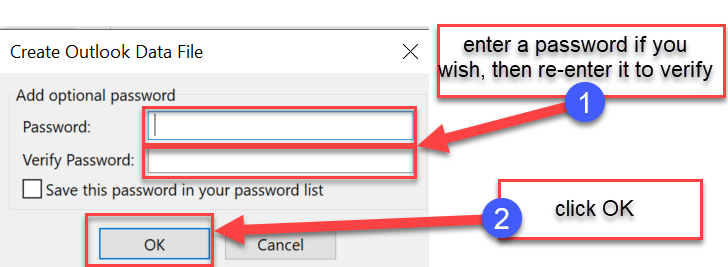
17. You may enter a password if you wish, then re-enter to verify it, then click OK. If you do not want a password please leave both fields blank and click OK
18. Re-enter your password once more, if you chose to use a password, then click OK. If you didn’t add a password, skip this step

19. You may see a progress bar, depending on the size of your mailbox. Once it is complete the backup file (.pst) will be in the Save Location you picked with the filename you chose.

You can now Import your mailbox into your New Email account. Instruction on how can be found here. [click here]